You know that moment when you stroll through the pumpkin patch, eyes alight with visions of fall grandeur, only to bring a batch home and realize you’re stuck in a rut of the same old carving antics? I’ve been there too — staring at a perfectly shaped pumpkin, feeling the excitement fade under the weight of deciding what to carve this year. But let me tell you, inspiration struck last autumn in the cozy warmth of my living room, surrounded by paint bottles, brushes, and a creative spark that refused to be carved away.
Decorating pumpkins with paint instead of carving them opened up a whole new world of possibilities, and it’s not only less messy but also offers endless opportunities for creativity. The best part? No need to battle with sharp tools and slimy seeds! After experimenting with a few designs, I found myself brimming with ideas I couldn’t wait to share. So if you’re ready to swap the carving knife for a paintbrush, let’s dive into ten practical and vibrant ways to transform your pumpkins into whimsical works of art this season.
1. Transform Pumpkins with Ombre Effects
Ombre pumpkins are a fantastic way to add a sophisticated touch to your fall decor! To achieve this stunning gradient effect, start by selecting two or three complementary paint colors that transition well, like a soft cream, a warm orange, and a deep rust.
1. **Prep Your Pumpkins:** Clean and dry your pumpkins thoroughly. For best results, use faux pumpkins so you can reuse them year after year.
2. **Base Coat:** Apply a base coat of the lightest color and let it dry completely.
3. **Blend It Up:** Using a sponge or a brush, dab the middle color on the pumpkin, blending it into the base coat. Work in sections to maintain a smooth transition.
4. **Finishing Touch:** Finally, add the darkest shade at the bottom by blending upward. This creates that gorgeous ombre look!
Display your beautiful ombre pumpkins in clusters on your porch or as a centerpiece. They’ll look stunning against golden autumn leaves or paired with rustic decor elements like burlap or twine! Happy decorating!
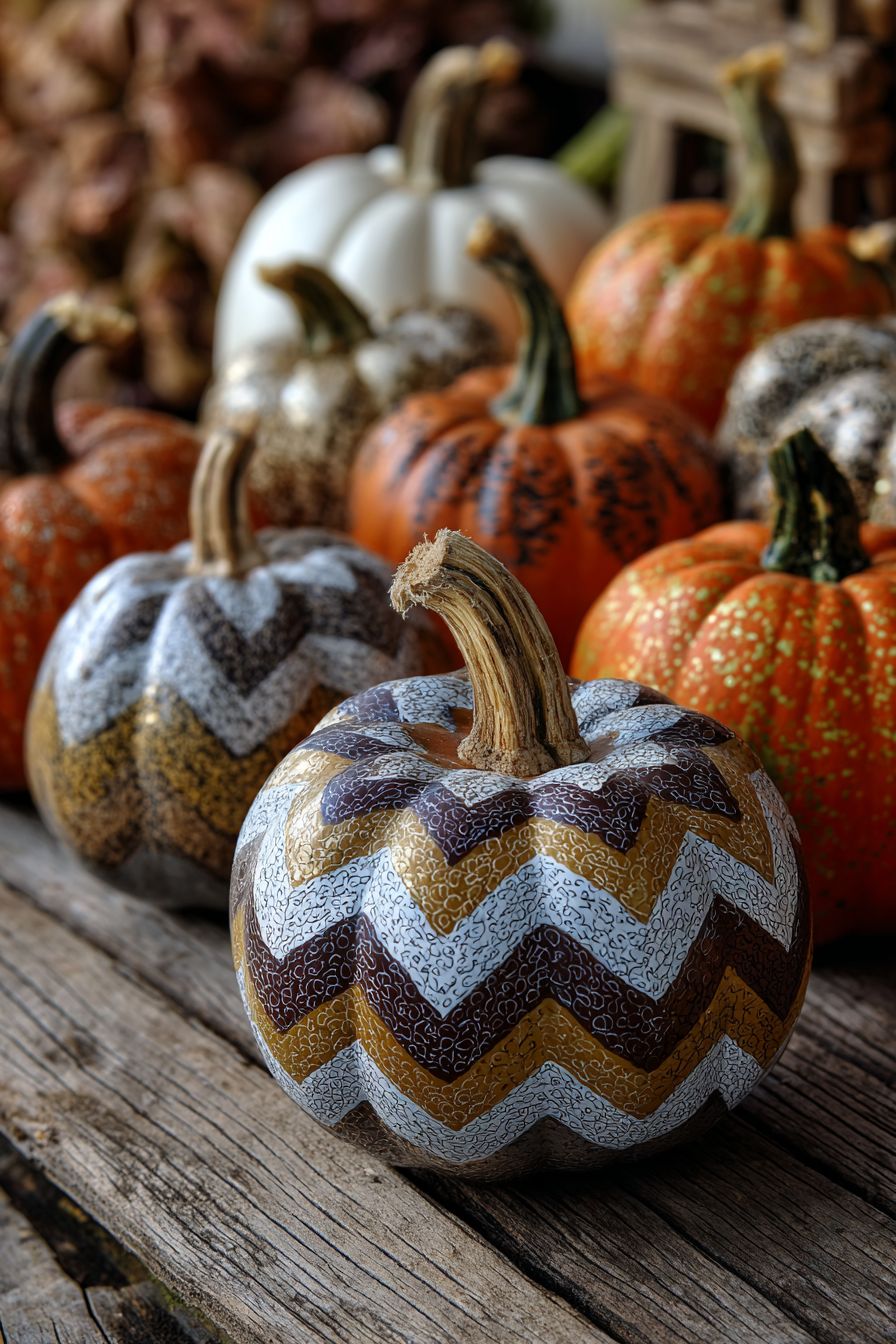
2. Create Patterns with Chevron Stripes

Chevron stripes are such a fun way to add a contemporary flair to your decorative pumpkins! To get started, choose two or three bold colors that really pop—think vibrant oranges, electric blues, or playful pinks. First, paint the entire pumpkin in your base color (like white or a light pastel).
Once that dries, print out a chevron stencil or create one yourself using painter’s tape. Simply cut the tape into triangles and arrange them in a chevron pattern. Press the tape down firmly to prevent any paint bleeds. Then, paint over the exposed pumpkin areas with your chosen accent colors and carefully remove the tape while the paint is still wet for crisp lines.
When styling, group these striped pumpkins with solid-colored ones for a dynamic display that catches the eye. This design is not just easy but also offers endless possibilities to let your creativity shine! Happy crafting!
3. Organize with Chalkboard Painted Pumpkins

Using chalkboard paint on pumpkins is a fun way to add a personal touch to your fall decor! Start by painting your pumpkin with chalkboard paint (available at craft stores) and let it dry completely. Once ready, use chalk to write festive messages, jot down reminders, or even draw cute doodles.
For a charming dining experience, consider using these pumpkins as unique place settings. Simply write each guest’s name on a painted pumpkin at the table. You can easily erase and update them for different occasions, making this a versatile and creative decor idea. Happy decorating!
4. Maximize Impact with Metallic Finishes

Metallic finishes can transform your pumpkins from basic to breathtaking! Start by choosing your metallic paint—gold, silver, or bronze work beautifully. Once you’ve got your hue, make sure to clean your pumpkin to ensure smooth application.
For a chic look, try a simple dip technique: pour your metallic paint into a bowl and dip the top half of your pumpkin, letting it dry completely before finishing with a clear sealant. This creates a stunning contrast that really catches the light. If you’re feeling adventurous, use painter’s tape to create geometric patterns, then fill in the spaces with your metallic paint for a modern twist.
Position these glam pumpkins on your front porch or dining table for an instant seasonal upgrade! They’re perfect for welcoming guests or adding a festive edge to your home decor. Happy decorating!
5. Simple Stenciled Silhouettes for Elegance

When it comes to elevating your pumpkin decor, stenciled silhouettes are a chic and effortless choice. Simply pick a stencil that matches your style—think classic leaves, graceful bats, or even geometric shapes. Secure it onto your pumpkin with painter’s tape, grab your favorite paint (a matte black or metallic gold works beautifully), and gently brush over the stencil.
For a cohesive look, consider stenciling the same design across multiple pumpkins, varying the sizes for visual interest. This approach is not only minimalistic but also super elegant, making it perfect for any fall gathering. Plus, the best part? You can easily switch up the stencils each year for fresh seasonal vibes!
6. Budget-friendly Dotted Pumpkin Design

Decorating pumpkins doesn’t have to be a pricey endeavor! For a budget-friendly and delightful DIY project, try the dotted pumpkin design. Grab some inexpensive craft paint in fun colors like teal, orange, and gold.
Start with a clean, dry pumpkin, then use a sponge or a foam brush to create dots of various sizes all over the surface. Play around with color combinations—maybe even create a gradient effect for a whimsical touch!
If you’re worried about precision, use a pencil to lightly mark where you’d like your dots to go before you start painting. This will help you space them out evenly. Once you’re done, consider sealing your masterpiece with a spritz of clear acrylic sealer to protect your design. You’ll end up with a charming pumpkin that adds unique flair to your fall decor without spending a ton!
7. Transform with Geometric Shapes

Geometric shapes can totally elevate your pumpkin game this season! Start by choosing a base color—think vibrant orange or classic white. Then, grab some painter’s tape and carefully apply it in the shape of triangles, hexagons, or even stripes. When you’re ready, paint over the exposed areas with a contrasting color like deep navy or metallic gold. Once it’s dry, peel off the tape to reveal those crisp, clean lines. You’ll have pumpkins that really pop and fit perfectly with modern décor. Trust me, your friends will be wowed by your artistic flair!
8. Create Nature-inspired Leaf Patterns

Creating nature-inspired leaf patterns on your decorative pumpkins is a fantastic way to embrace the beauty of autumn! Start by selecting a few small pumpkins—white or pastel ones work beautifully as a backdrop. Gather some leafy stencil shapes; you can even press actual leaves against the pumpkin for texture. Using a sponge brush, dab on shades of green, orange, and gold for a beautiful ombre effect.
Pro tip: Paint the leaves in a scattered pattern around the pumpkin, or go for an all-over design for a more cohesive look! Once they dry, pair your leaf-painted pumpkins with some cozy materials like burlap or string lights for an inviting fall display. It’s a simple yet stunning way to celebrate the season!
9. Organize a Rainbow of Pumpkins

Creating a rainbow of pumpkins is such a fun way to add a burst of color to your fall decor! Start by gathering a variety of pumpkins in different shapes and sizes. Get high-quality acrylic paints in a full spectrum of colors—think reds, yellows, greens, blues, and purples.
Begin by painting your pumpkins in gradient order, working from one end of the color wheel to the other. For instance, a bright red pumpkin can lead into a warm orange, then yellow, and so on. Once your pumpkins are painted and dried, arrange them on a mantle, dining table, or even outside on your porch to create a cheerful focal point. This joyful display doesn’t just brighten up a space; it can also serve as a welcoming sight for guests!
10. Maximize Drama with Black-and-White Contrast

Embrace the drama of black and white by creating bold patterns or abstract shapes on your pumpkins! Start by giving them a smooth coat of matte black paint, then let your creativity flow with white designs—think stripes, polka dots, or even geometric shapes.
For an added touch, use painter’s tape to create clean lines or stencils for intricate motifs. Position these eye-catching pumpkins as a centerpiece on your dining table or as striking decor on a front porch. This monochrome scheme not only serves as a stunning autumn accent but easily ties in with modern home decor, making it perfect for any contemporary space. Plus, they’re so fun to make that you might just want to decorate a whole pumpkin patch!
And there you have it—ten creative paint designs to make your pumpkins the star of the season! I hope these ideas have sparked your imagination and given you some inspiration for your own decorating adventure. Remember, each pumpkin is a blank canvas, just waiting for your personal touch.
I know you’ll create something wonderful, whether you try one of these ideas or let them inspire a design all your own. Just grab your brushes, paints, and a pumpkin or two, and dive in. It’s all about having fun and letting your creativity flow. Don’t worry about perfection; the beauty of these projects is in their uniqueness and the joy they bring.
I’m so excited to see where this journey takes you. Enjoy the process, and remember, your pumpkins will be as beautiful and unique as they can be—as beautiful and unique as you are! Happy painting!