I remember the first time I walked into a thrift store with a vague idea of wanting to spruce up my home on a budget. The aisles were filled with hidden gems just waiting to be discovered, but at first glance, it felt overwhelming. Have you ever stood in a thrift store wondering how to turn that random collection of objects into the chic decor you see on Pinterest? The struggle is real, my friend, and you’re definitely not alone.
What I’ve found is that the charm of thrift-flipping lies in its transformative potential. It’s incredible what a little creativity and a weekend can do for those forgotten pieces. You don’t need to be an expert DIYer to make a big difference—just some inspiration and a few simple ideas to get you started. I’m excited to share 21 easy thrift flip decor projects that will not only elevate your home but also bring a sense of accomplishment and personality to your space. Let’s dive in and turn those untouched treasures into standout decor pieces!
1. Transform Old Teacups Into Candles
Transforming old teacups into candles is a delightful way to breathe new life into those pretty finds! Start by gathering your materials: used teacups, candle wax (you can get this at craft stores), wicks, and a double boiler for melting wax.
Begin by melting your candle wax according to the package instructions. While it’s melting, place a wick in the center of each teacup. You can secure it with a dab of wax or a little tape at the bottom.
Once the wax is melted, carefully pour it into the teacups, filling them about ¾ full. Allow the candles to cool completely, usually a few hours, before lighting them. Voila! You now have charming teacup candles that not only add a cozy glow to your space but also serve as unique conversation starters. Place them along your mantel or use them as part of a centerpiece—your home will thank you!
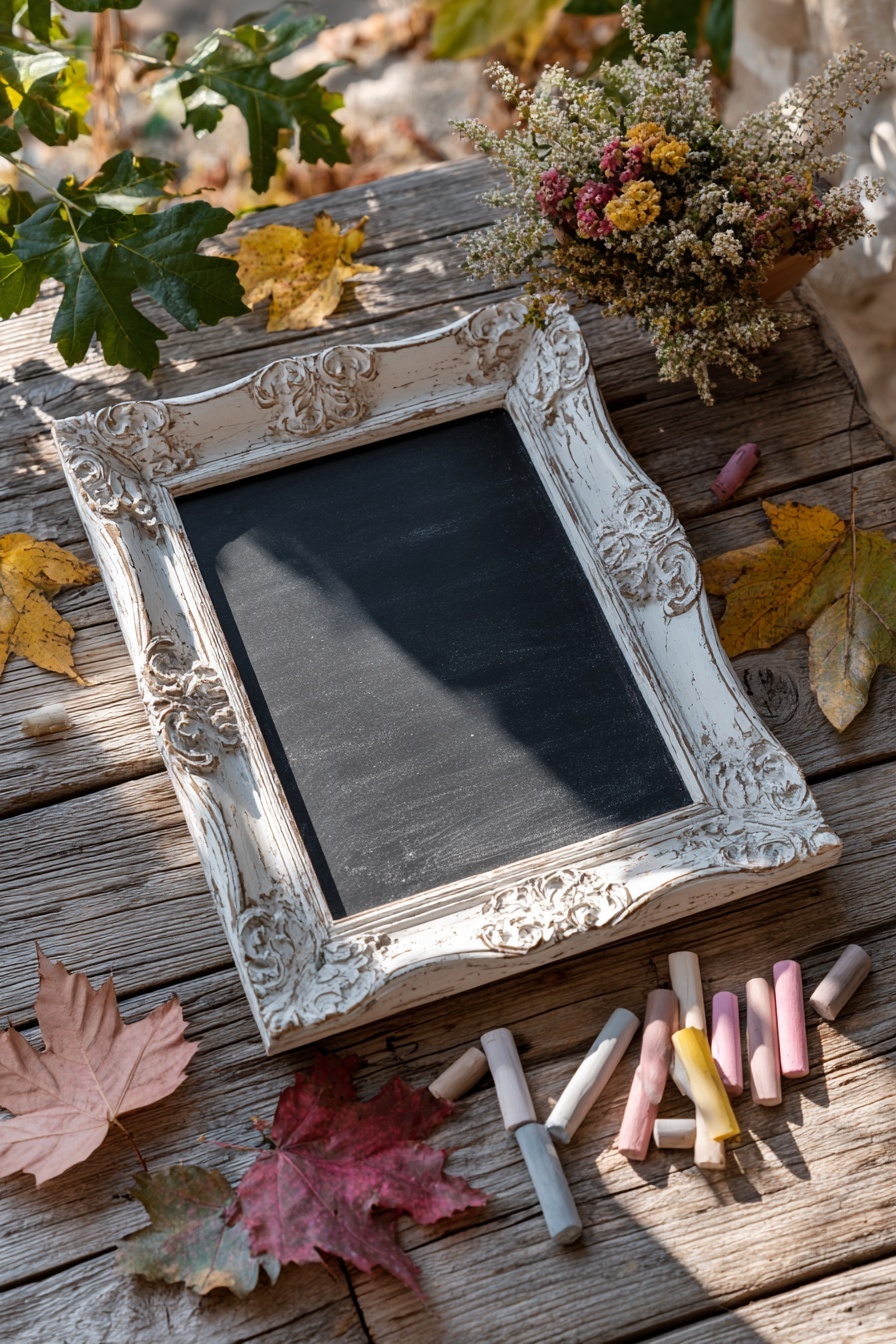
2. Create Rustic Chalkboard From A Frame

Give that dusty, unused frame a new lease on life by turning it into a charming rustic chalkboard! You just need some chalkboard paint and a little creativity. First, start by removing the glass from the frame and giving it a quick clean. Next, paint the backing board with chalkboard paint, following the manufacturer’s instructions—usually two coats will do the trick.
After it’s fully dried, pop it back into the frame, and you’re ready to write! Hang it in your kitchen for sweet notes or daily inspirations. For an added touch, you could distress the frame with sandpaper for a more rustic look. How lovely will it be to jot down reminders or quotes that brighten your day? This is an easy weekend project that not only spruces up your decor but also adds a functional element to your space!
3. Turn Vintage Suitcases Into Side Tables

Stacking old suitcases for a stylish side table is an easy and fun weekend project! Simply find three vintage suitcases of varying sizes—thrift stores or garage sales are great for this. Start by stacking the largest suitcase on the bottom, then layer the medium-sized one, and finish with the smallest on top.
For added flair, consider painting or refurbishing them; a fresh coat of pastel paint can give them new life while still keeping their character. Not only does this create a charming conversation piece, but it also offers fantastic storage for books, blankets, or anything else you want to keep tucked away but accessible. Next time you have friends over, watch their eyes light up as they notice your stylish, functional side table!
4. Upcycle Mirrors Into Shabby Chic Trays

Transforming a thrifted mirror into a shabby chic tray is a delightful project that can add charm to your home! Start by selecting a mirror with an interesting frame—think ornate or vintage styles. Next, give it a good clean and a light sanding if the surface feels rough.
Pick out a soft pastel or white chalk paint to evoke that beloved shabby chic vibe, and apply a couple of coats, allowing each to dry thoroughly. Once it’s dried, you can distress the edges lightly with sandpaper to give it that well-loved look.
Finally, place your new tray on a coffee table to showcase fresh flowers or your favorite coffee mugs. Instant charm and practicality! Plus, it’s a great conversation starter when friends come over!
5. Refinish Picture Frames For Modern Art

Give those dusty old picture frames a new lease on life! Start by choosing a color that complements your home decor—soft pastels for a light touch, or bold hues for a striking splash. Just sand down any rough edges, apply a coat of primer, and then finish with your chosen paint.
When styling a small gallery wall, mix and match the newly refinished frames with your favorite prints or DIY art pieces for an eclectic yet cohesive look. It’s a weekend project that not only refreshes your space but is also a delightful way to showcase your personality! Plus, don’t forget to add some dimension; float one frame off the wall with a pop of color behind it to create visual interest. Happy flipping!
6. Transform Old Books Into Shelves

Transforming old hardcover books into quirky shelves is an inventive way to add character and charm to any corner of your home. Start by gathering a few sturdy books—choose unique or colorful covers for an eye-catching display!
Next, you’ll want to remove the pages (you can keep them for another craft project!). Use the book covers as the shelf’s base, securing them to the wall with L-brackets. If you’re feeling adventurous, try using three book covers to create a small wall-mounted cube for added visual appeal.
Pro tip: Style your new book shelves with small plants or collectibles that reflect your personality, and voilà—your space instantly feels cozier and more interesting!
7. Make A Vase From A Tin Can

Transforming a regular old tin can into a chic vase is not just a fun weekend project but also an eco-friendly choice! Start by thoroughly cleaning your can, then pick a rope, ribbon, or fabric that matches your decor. Simply glue or wrap it around the can, securing it at the base.
Once that’s done, fill it with water and your favorite flowers—fresh or dried! For a lovely touch, consider a can that’s been painted in a soft color, giving it a bit of a farmhouse feel. This simple project works beautifully in any room, especially as a centerpiece on your dining table or a charming accent on a shelf. And don’t forget to check out your local thrift store for unique fabric scraps to make it extra special!
8. Convert A Ladder Into A Towel Rack

Transforming an old wooden ladder into a chic towel rack is a simple weekend project that brings both functionality and charm to your bathroom! Start by giving the ladder a good clean and, if desired, a fresh coat of paint—think white for a coastal vibe or navy for a modern look.
Next, lean the ladder against a wall in an area that gets plenty of space; allow the rungs to showcase colorful, fluffy towels. To secure it and prevent the ladder from tipping, you may want to anchor it with adhesive wall hooks or small brackets. Not only will it save space, but it’ll also give your space a rustic touch. Bonus points for accessorizing with some hanging plants or decorative items on the rungs for added flair!
9. Turn Plates Into A Wall Display

Turning plates into a wall display is such a fun and creative weekend project! Start by gathering a collection of mismatched plates—vintage finds at thrift stores or even pieces from your own cabinets work perfectly.
Next, lay the plates out on the floor to experiment with different arrangements until you find a setup that feels balanced and visually appealing. Aim for a mix of sizes, shapes, and patterns for a dynamic look.
Once you’re happy with the layout, mark the spots on the wall where each plate will go. Use plate hangers or adhesive strips for easy mounting without damaging your walls. Voilà! You’ve created a stunning focal point that adds personality to your space—plus, it’s a great conversation starter!
10. Craft A Pendant Light From A Basket

Transforming a simple woven basket into a chic pendant light is easier than you might think! First, find a sturdy basket at your local thrift store—look for one with an interesting shape. Next, you’ll need a light fixture kit, which you can grab online or at a hardware store.
To get started, remove the bottom of the basket if it has one, then carefully thread the electrical cord from the kit through the top. Secure the fixture to the basket using glue or wire, ensuring it’s stable. Finally, hang your new light fixture in your living room or dining area. It not only brightens the space but also adds a lovely texture that’s sure to impress guests! Keep an eye on the wattage of the bulb you choose to maintain a cozy ambiance. Happy crafting!
11. Repurpose Wine Crates Into Shelves

Repurposing wine crates into rustic wall shelves is a chic way to add character to your space! Start by thoroughly cleaning your crates and giving them a light sand if needed for a smooth finish. Choose a wall that needs a little love, then use brackets to secure the crates at varying heights for an eye-catching display.
Imagine styling them with your favorite books, a small potted plant, or even a few quirky collectibles. For added flair, you could paint or stain the crates to match your room’s color palette. This project not only showcases your finds but also gives your home a personal touch that’s sure to impress your guests!
12. Paint Old Furniture For A New Look

Updating old furniture with a fresh coat of paint is such a fantastic way to breathe new life into your space! For example, when you have a well-loved wooden chair that’s showing signs of wear, why not give it a playful pop of color?
Begin by giving your piece a good clean, then sand lightly to help the paint adhere better. Choose a color that complements your decor—maybe a calming sage green or a bold navy blue for some drama.
Once you’ve picked your paint (chalk paint works wonders), apply two thin coats for an even finish. Don’t forget to seal it with a clear topcoat for durability! This simple thrift flip is an affordable way to express your style while enjoying some satisfying weekend DIY fun.
13. Create Drawer Shelves From Dresser Parts

Repurposing old dresser drawers into wall shelves is a fantastic weekend project that adds both charm and functionality to your space! Start by removing the drawers from a thrifted dresser, making sure they’re in good condition. You can then sand and paint or stain them to match your room’s aesthetic—think bright colors for a playful vibe or classic white for a clean look.
Next, secure brackets to the wall at your desired height, ensuring they can support the weight of your new shelves. Simply attach the drawers to these brackets and voilà! You’ve created quirky display shelves perfect for showcasing plants, books, or even your favorite knick-knacks. When styling a space, consider grouping smaller items on one shelf and larger pieces on another to keep the look balanced and visually appealing. Happy flipping!
14. Decorate With Vintage Glass Bottle Vases

Decorating with vintage glass bottle vases is not only a fun way to add character but also a fantastic weekend project! Start by hunting for colorful glass bottles at your local thrift store—look for varying shapes and sizes to create visual interest. Once you have a collection, give them a gentle wash to remove any dust.
Now, arrange your beauties on a window sill or a mantel. For a cheerful touch, add a few fresh flowers or some dried floral stems that complement the bottles’ hues. If you’re feeling extra creative, try grouping them by color to craft a stunning ombre effect! Just imagine the burst of nostalgia and color filling your space—it’s a simple way to elevate your decor while sharing a story from the past.
15. Craft A Headboard From Old Doors

Transforming an old door into a headboard is a delightful way to elevate your bedroom decor with a touch of rustic charm. Start by selecting a door that speaks to you—vintage panel doors or even barn doors work beautifully! Sand down any rough edges and paint or stain it in your preferred color to match your bedroom’s vibe.
Once prepped, attach it to the wall or to a wooden frame for stability. For an extra touch, consider adding fairy lights or a series of framed photos along the top edge of the door for a cozy, personalized feel. This project not only recycles an old piece but also gives your space a unique focal point. Happy flipping!
16. Transform A Window Frame Into A Mirror

Transforming an old window frame into a stylish mirror is a fantastic weekend project that not only brings a unique touch to your space but also opens up the area, creating an illusion of more light and space. Start by finding a vintage window frame at your local thrift store—look for one that speaks to you, whether it’s rustic wood or a chic, painted finish.
Once you’ve snagged your frame, remove any old glass or hardware. Measure the opening and order a mirror cut to size from a local glass shop or online retailer. For an added personal touch, consider painting the frame in a vibrant hue or applying a distressed finish. Once your mirror piece is ready, simply secure it into the frame with mirror clips or glue.
Hang your newly transformed mirror in your entryway or living room to instantly brighten the space. It’s not just functional; it’s a conversation starter too! Plus, this project is budget-friendly and environmentally conscious—what’s not to love?
17. Make A Coffee Table From Pallet Wood

Imagine transforming old pallet wood into a stunning coffee table that becomes the centerpiece of your living room! Start by carefully dismantling your pallets (remember to keep your fingers safe!) and sand down the wood to remove any rough edges.
Next, lay out the pieces in a design that speaks to you—perhaps a unique rectangular shape or a square for a cozy vibe. Secure the planks together using wood screws to create a sturdy tabletop. For a chic touch, consider staining it in a warm walnut color or painting it in a soft white.
Lastly, add some hairpin legs for an industrial twist or use reclaimed wood blocks for a rustic feel. Decorate the table with some fresh flowers or your favorite coffee table book, and you’ve not only crafted a piece of furniture but also a conversation starter for your guests! Happy crafting!
18. Create Lanterns Using Mason Jars

Mason jars can easily transform into delightful lanterns that bring a cozy vibe, whether you’re indoors or outside. Start by gathering some clear mason jars, fairy lights, or tealight candles. For a touch of whimsy, you can add some decorative twine or burlap around the top. Just fill the jar with lights or drop in a tealight, then secure the lid if you want to hang them.
When styling your space, consider grouping multiple lanterns at varying heights on your patio table or lining them along a pathway for a whimsical glow. They also make fantastic centerpieces for a rustic-themed dinner. So light up those evenings with this cheerful thrift flip!
19. Upcycle A Chair Into A Shelf

Transforming an old chair into a unique shelf is a fun weekend project that will definitely turn heads! Start by selecting a sturdy chair—think classic wooden designs. You’ll want to remove the seat and sand down any rough edges. Next, paint or stain it in a color that complements your decor; a chic white or vibrant teal can add character.
Once that’s done, secure a couple of wooden planks where the seat used to be to create your new shelving space. Use small brackets for extra support if you’re planning on displaying heavier items, like books or plants. When styling your new shelf, mix in some decorative boxes or fun knick-knacks to make it truly yours. It’s a smart storage solution that not only declutters but also adds a touch of whimsy to your space!
20. Turn Fabric Scraps Into A Quilt

Got a stash of fabric scraps lying around? Let’s transform them into a cozy, bespoke quilt! Start by gathering all those leftover pieces in various shapes and sizes. A fun mix of colors and patterns makes for a visually appealing quilt.
Next, lay out your fabric on a flat surface to create a design you love. Once you’ve settled on a layout, cut the pieces to your desired size—think charming rectangles or funky triangles! Then, it’s time to sew. Use a sewing machine to stitch the pieces together, or try your hand at hand-stitching for a more personal touch.
Don’t forget to add a soft batting layer in between your quilt top and backing for warmth! Finally, finish it off with a simple binding around the edges. Voila! You have a unique quilt that not only keeps you warm but can also make a thoughtful gift for friends. Happy sewing!
21. Assemble A Plant Stand From Spare Wood

Turning leftover wood pieces into a stylish plant stand is not only a fun project but also a great way to elevate your indoor greenery! Start by gathering any spare wood—think old shelves, pallets, or even fence boards.
Once you’ve got your materials, sketch a simple design for the stand. A tiered or staggered style works wonderfully, allowing different plants to catch the light. Cut your wood to size, and if you’re handy with a drill, assemble it securely. Don’t forget to sand down any rough edges for a polished look!
To add that personal touch, paint or stain the wood in a shade that complements your decor—maybe a soft white for a farmhouse vibe or a bold color to make a statement. Place your stand in a sunny corner, showcase your favorite potted plants, and enjoy the fresh vibe it brings to your space!
And there you have it, 21 easy thrift flip decor ideas that are perfect for transforming your space over the weekend! Each project is a chance to let your creativity shine and truly make your home feel like your own. Whether a simple coat of paint or a more involved upcycle, I’m sure you’ll find something that speaks to your style and sparks your imagination.
Remember, it’s all about having fun and experimenting. You don’t need to follow any rules—just go with what feels right. I’m so excited for you to start this decorating journey and can’t wait to hear about how it turns out. Trust yourself and your unique style, and you’ll be amazed at what you can create.
So grab your tools, pick an idea that resonates, and enjoy the process. Happy decorating, and remember, you’ve totally got this!