I remember the first time my husband and I decided to spruce up our outdoor space; it felt pretty overwhelming. We wanted to do something that would bring life and color to our backyard but didn’t know where to start. Have you ever stood in front of a blank canvas, whether it’s a garden or a room, and felt that wave of uncertainty? Trust me; you’re not alone. It’s like you have this vision of a bustling garden paradise, but the path to get there seems daunting.
That’s when we stumbled upon the idea of planter boxes. They seemed like the perfect solution—practical, customizable, and a fantastic way to bond over a weekend project. Plus, there’s something so satisfying about creating something beautiful together that you can admire every day. If you’ve ever found yourself wishing for a more vibrant patio or deck, I’ve got some exciting ideas to share with you. Let’s dive into 20 planter box ideas that you and your husband can build together, adding a splash of personality to your outdoor oasis.
1. Build a Simple Cedar Planter Box
Cedar is not just gorgeous; it’s super practical for outdoor planter boxes too! Grab your husband, and let’s turn a Saturday into a fun DIY project. Start by measuring a simple rectangular design—think 4 feet long by 2 feet wide. Cut your cedar boards to size and use wood screws for a sturdy assembly.
For an added touch, consider drilling drainage holes in the bottom to keep your plants thriving! Once assembled, you can treat the wood with a non-toxic sealant to enhance its durability. Voilà! You now have a charming planter that will not only showcase your favorite flowers but also age beautifully over time, adding character to your garden. Happy planting!
2. Craft a Tall Vegetable Planter

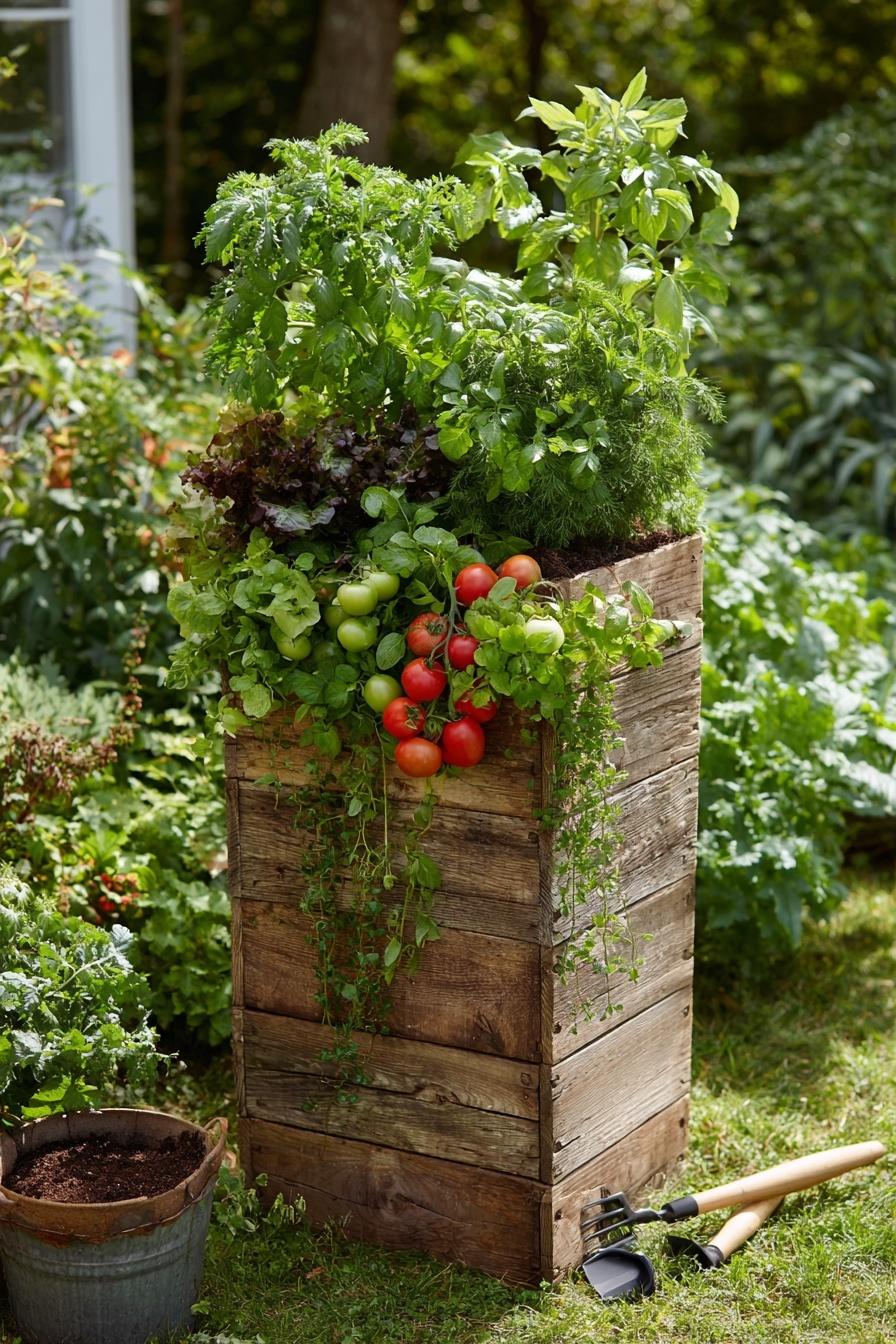
Crafting a tall vegetable planter is a great weekend project that combines style with practicality, making it a breezy addition to your gardening space. Start with rot-resistant wood like cedar or redwood, which not only looks lovely but will last for years. Aim for a height of about 30-36 inches—this ergonomically friendly design saves your back while offering easy access to your favorite herbs and veggies!
To build your tall planter, simply cut the wood into sides and a bottom, then secure the frame with wood screws. Optionally, line the inside with landscaping fabric to keep the soil in place while allowing drainage. Fill it with a mix of potting soil and compost for nutrient-rich growth. When styling your planter, opt for a welcoming color paint that complements your garden—try a soft sage green or classic white, which can enhance any outdoor space while keeping your veggies looking chic. Happy planting! 
3. Create a Multi-Tiered Herb Planter

Creating a multi-tiered herb planter is a fun weekend project that not only looks fantastic but also saves space in your garden or patio. To get started, grab some wood planks and nails or screws, and cut the wood into several boxes of varying heights.
Begin by stacking these boxes on top of each other, securing them with brackets for stability. This layered design allows your herbs, like basil, mint, and rosemary, to grow in style while getting enough sunlight. For added flair, you can paint or stain the wood to match your outdoor decor.
When it’s time to plant, think about mixing textures—try a sleek thyme next to fuzzy sage for visual interest. Place your new herb garden near your kitchen for easy access. Trust me, having fresh herbs at hand will elevate your cooking game!
4. Design a Rustic Pallet Planter

Ready to get your hands a little dirty? Designing a rustic pallet planter is not only eco-friendly but also a super cute way to add charm to your garden! Start by finding some reclaimed pallets—check local stores or online marketplaces like Craigslist or Freecycle.
Once you’ve got your pallets, just sand them down to remove any sharp edges or splinters. Next, stack a few pallets to create the desired height for your planter, then use a staple gun to secure them. Feel free to add a protective coat of wood sealant to keep them safe from the elements!
To finish it off, line the inside with landscaping fabric to retain soil and just fill it up with your favorite flowers or herbs. Imagine the fresh basil you could grow for your kitchen! So gather your supplies and make it a fun project—your beautiful rustic planter awaits!
5. Construct a Classic Rectangular Box

Building a classic rectangular planter box is a fun weekend project that you and your husband can tackle together! Start by measuring out a section of your yard or balcony where the box will sit, and keep the dimensions manageable—ideally, around 3-4 feet long, 2 feet high, and 1.5 feet wide.
You’ll need untreated cedar or redwood for durability, screws, and wood glue. Begin by cutting your wood into the right lengths: two long pieces for the sides and two shorter pieces for the ends. Once you’ve shaped your box, drill pilot holes and assemble it by screwing the pieces together for stability. Don’t forget to sand the edges for a smooth finish!
Finish it off by adding a coat of wood sealer to protect the box from the elements. Then, fill it up with rich soil and your favorite plants—herbs or flowers look fabulous in these classic styles. When styling your outdoor space, think about placing your rectangular box along a garden pathway or against a sunny wall for maximum impact! Don’t forget to sneak in some fairy lights or decorative stones for a personal touch!
6. Assemble a Hanging Window Box

Assembling a hanging window box is a delightful DIY project that not only enhances your curb appeal but also maximizes your planting potential in tight spaces! Start by selecting untreated cedar or redwood for your box—these materials are durable yet lightweight, making them ideal for hanging.
To build, cut your wood to your desired length (typically around 36 inches is perfect for most windows) and then assemble the planks into a rectangular box using screws. Sand the edges for a smooth finish before sealing with a non-toxic wood stain to protect against the elements.
Once constructed, hang it securely with brackets from your window frame. Fill it with an array of colorful flowers or fragrant herbs like basil and parsley for a splash of nature that you can enjoy while cooking. Trust me, it’s such a fun project to tackle together! Plus, every time you pass by, you’ll appreciate the beauty you’ve created as a team.
7. Craft a Stylish Chevron Planter

Crafting a stylish chevron planter can be a fun weekend project with your husband! Start by cutting wood planks at an angle to create the chevron pattern—aim for a classic 45-degree slant for a clean look. Assemble the pieces into a rectangular box, ensuring it’s sturdy enough to support your plants.
Once assembled, you can paint or stain it in a trendy color—try a bright teal for a pop against the greenery! Don’t forget to drill drainage holes at the bottom; your plants will thank you. When styling, consider using it to showcase vibrant herbs or seasonal flowers. The chevron design will definitely catch the eye and add a modern flair to your garden!
8. Frame Raised Garden Beds

Frame raised garden beds are a fantastic way to elevate your green thumb game! Not only do they improve drainage and allow for better soil control, but they also make gardening easier on your back. Think about it: no more bending down to the ground!
When you’re ready to build one, grab some rot-resistant wood like cedar or redwood for long-lasting durability. Start by assembling a rectangular frame with a simple design—just four pieces of wood interconnected at the corners. Make sure to choose a size that fits your garden space nicely; a common size is 4×8 feet, which gives you plenty of room for veggies or vibrant blooms. Before filling it with soil, line the bottom with landscaping fabric to prevent weeds from creeping in.
Imagine the joy of growing your own fresh tomatoes or colorful zinnias! Working on this project together can be a fun bonding experience, so roll up those sleeves and get to building!
9. Forge a Metal Frame Planter Box

Forging a metal frame planter box is a fantastic weekend project that combines rustic charm with industrial chic. Start by constructing a simple wooden box using rot-resistant wood like cedar or redwood. Just make sure it’s about 24 inches long and 12 inches deep—perfect for a variety of plants!
Next, you’ll create the metal frame using square steel tubing. Cut the tubing to form a base that wraps around the wooden box, leaving a few inches on the sides for stability. Use a welding machine to secure the pieces together securely. If you don’t have welding equipment, metal brackets can work just as well!
Lastly, give everything a coat of weather-resistant paint or finish to protect against the elements. Place your planter box on your patio or balcony, fill it with herbs, or even some striking succulents. When styling, pair it with textured outdoor pillows and a cozy throw to create a stunning garden vibe!
10. Make a Wheelbarrow Planter

Turning an old wheelbarrow into a planter is not only eco-friendly but also a fun weekend project! Start by cleaning out the wheelbarrow and then drilling a few drainage holes in the bottom. Next, fill it with potting soil and your favorite flowers or herbs—think vibrant marigolds or fragrant basil for a functional twist.
For a charming touch, add some decorative elements like colorful painted stones or a small garden sign. This whimsical planter will create a focal point in your garden and spark conversation among your guests. Trust me, when styling your outdoor space, a wheelbarrow planter is both functional and utterly delightful!
11. Build a Corner Planter with Benches

Building a corner planter with benches is a fantastic way to make use of otherwise wasted space while adding both greenery and seating. Start by measuring your corner area to determine how large your planter and benches should be. Use rot-resistant wood, like cedar or redwood, to ensure they last through the seasons.
Once you have your wood cut to size, assemble the planter box first. Leave enough width at the top for the bench seats—think about comfortable seating depth (around 18 inches is perfect). You can then attach the benches directly on top of the planter or have them as standalone pieces that fit snugly against it.
To style it, fill the planter with a mix of perennials and trailing plants for visual interest. Adding cushions to the benches in outdoor-friendly fabrics will invite you to sit back and enjoy your lush corner retreat. It’s a lovely project to tackle together, and you’ll both enjoy the fruits—and blooms—of your labor!
12. Design a Cinder Block Vertical Planter

If you’re looking to add an industrial edge to your garden, a cinder block vertical planter is a fantastic project to tackle with your husband! Start by stacking cinder blocks to create a modular system—it’s as easy as arranging them in a pattern that suits your space. You can customize the height and width based on your plant preferences.
For a charming touch, paint the cinder blocks in a color that complements your garden or home exterior. Consider adding some planting soil and a variety of herbs or succulents in each block’s openings. This way, you’ll have a lovely mix of plants that not only look great but also serve practical purposes. Don’t forget to secure the blocks, especially if you’re stacking them high. Happy planting!
13. Craft a Planter Box with Trellis

Adding a trellis to your planter box is a fantastic way to give climbing plants, like cucumbers or clematis, the support they need to flourish. Start by selecting a sturdy wood for your planter box, then cut your pieces to size. Assemble them into a box shape, ensuring it’s deep enough for roots to grow comfortably.
Next, to create the trellis, cut a piece of wood into a tall, sturdy vertical support—around 4-6 feet. Attach horizontal slats evenly spaced apart to serve as rungs for your plant to climb. Secure the trellis to the back of the planter box. A pro tip? Line your planter with landscape fabric before filling it with soil to ensure good drainage and keep out weeds.
Once your setup is complete, plant some climbers at the base, and watch them stretch towards the sun. Trust me, there’s something so satisfying about seeing your garden reach new heights!
14. Build a Sleek Concrete Planter

Building a sleek concrete planter is not only a fun weekend project but also adds a modern touch to your outdoor or indoor space. Start by gathering a few materials: quick-setting concrete mix, water, a mixing container, and a mold—this can be a wooden box or plastic container, depending on the size you want.
Mix the concrete according to the package instructions, then pour it into your mold. Don’t forget to poke holes in the bottom for drainage; your plants will thank you! Let it cure for at least 48 hours before removing it from the mold.
Once your planter is ready, it’s perfect for showcasing your favorite succulents or low-maintenance greenery. Position it on your porch or a sunny windowsill to make a stylish statement. Plus, a little touch of greenery always adds life to any contemporary space! Happy planting!
15. Create a Stacked Wood Log Planter

Creating a stacked wood log planter is a delightful way to bring a touch of rustic charm to your garden with your husband! Start by gathering logs of varying sizes—think about using eco-friendly materials or repurposing fallen branches. Begin by stacking the logs in a staggered manner, securing them with natural twine or drilling them together for added stability.
To make it a bit more special, consider carving out small sections of the logs to hold potting soil and your favorite flowers or herbs. Position the planter in a sunny spot and watch as the greenery and wood blend beautifully with nature. This project not only adds character to your yard but also provides a fun bonding experience. Happy planting!
16. Construct a Garden Box on Wheels

Building a garden box on wheels is a fun weekend project that adds flexibility to your gardening! Start with untreated cedar wood for durability. Measure and cut your pieces: four sides, bottom, and a few extra boards to create a sturdy frame.
Once assembled, attach casters to the base to make it mobile. This way, you can move your planter around to catch the sunlight or reposition it as the seasons change. For a unique touch, paint the sides in fun colors or stain them to match your outdoor decor! Trust me, this adorable mobile garden box will not only be functional but also add a personal flair to your space.
17. Assemble a Triangular Corner Planter

When thinking about maximizing your space, a triangular corner planter can be a game-changer! Ideal for those snug corners in your patio or garden, this planter design adds a charming touch while offering plenty of room for your favorite flowers or fragrant herbs.
To tackle this project, grab some untreated wood and cut it into three equal lengths for the sides of your triangle—about 3 feet per side usually works well. Assemble by creating a frame and then add a slatted bottom for drainage. Once built, place it in that under-utilized corner you’ve been overlooking. Plant it with vibrant petunias or handy basil, and watch your small space bloom beautifully! Trust me, it’s a fun weekend project you can enjoy together, and your plants will thank you for it!
18. Build a Kid-Friendly Planter Box

Building a kid-friendly planter box is a delightful way to spark your children’s interest in gardening! To get started, opt for a shallow wooden box—around 2 feet long and 1 foot wide—so little hands can easily reach the soil.
Here’s a simple step-by-step: First, gather untreated cedar or pine lumber for safety, hammering together the sides and bottom of the box. Incorporate drainage holes by drilling a few in the bottom! Next, let the kids paint the outside in bright, fun colors to add a personal touch.
Fill the box with lightweight potting soil and guide them to plant easy-to-grow seeds like sunflowers or herbs. As you tend to the plants together, you’re not just cultivating a garden; you’re nurturing precious family memories. Get ready to watch their pride bloom!
19. Create a Bamboo-Lined Planter Box

Transform your outdoor space with a charming bamboo-lined planter box! Start by measuring and cutting your wooden base to your desired size, then line the interior with bamboo slats for that tropical flair. Secure the slats with outdoor adhesive or nails for durability.
Pro tip: When choosing plants, opt for tropical varieties like ferns or bird of paradise to complement the bamboo aesthetic. Not only will this design be eco-friendly, but it will also create a stunning focal point in your garden or patio. Happy building!
20. Make a Galvanized Tub Planter

Transforming old galvanized tubs into beautiful planters can be a fun project for you and your husband! These tubs aren’t just durable; they also bring that charming vintage farm vibe right to your garden.
Start by locating some affordable galvanized tubs—thrift stores or online marketplaces often have great finds. For drainage, drill holes in the bottom. Next, fill with potting soil, leaving enough space for your plants. Try mixing colorful annuals or herbs for a delightful combo.
Don’t forget to place your new planters in a sunny spot; herbs love the light! Add some rustic touches with burlap or wooden accents around the tubs for an extra dash of country charm. Happy planting!
And there you have it—20 fantastic planter box ideas to spark your creativity and add a little extra charm to your home with your husband by your side. Whether you’re dreaming of a cozy herb garden or a vibrant flower display, there’s something here for everyone’s taste and skill level. Remember, the most important part is simply to dive in and have fun with it, choosing the projects that speak to you both.
Take that first step and pick the idea that lights you up the most. You’ve got this, and who knows? You might discover a new shared hobby along the way. Enjoy the journey, let your personalities shine through your creations, and relish those little moments of triumph together. Here’s to blooming projects and joyful crafting days ahead. Happy building, and have the best time making memories in your outdoor space!