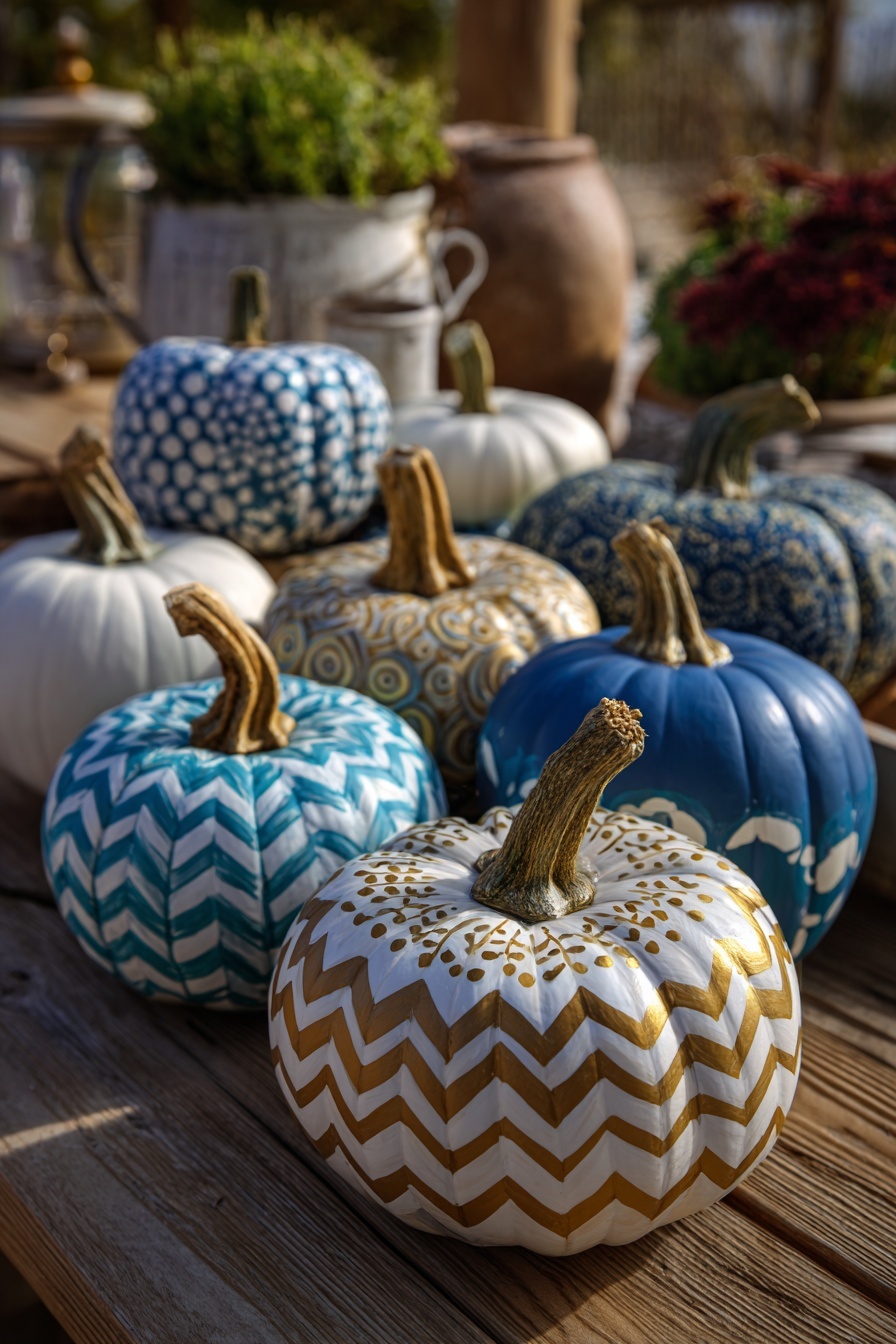
Every fall, I find myself staring at a pile of pumpkins, intent on crafting the perfect autumn display without diving into the messy chaos of carving. Does the thought of scooping out pumpkin guts stress you out as much as it does me? I used to dread it, convincing myself there must be a more straightforward, cleaner way to embrace the season’s spirit.
After experimenting with every no-carve idea I could find, I realized there’s a whole world of creative and elegant pumpkin decorating possibilities out there! From simple painted designs to embellished works of art, the options are endless—and they keep your home tidy in the process. I’ll admit, once I discovered these no-carve techniques, I was hooked. So, let me share with you 20 of my favorite ideas. Whether you’re an artistic pro or all thumbs, there’s a project here that’s perfect for you, ready to spark joy in your autumn decorating adventures without a single slice and dice.
1. Paint Stylish Geometric Patterns

For a chic and modern twist on pumpkin decorating, grab some painter’s tape and your favorite bright paints! Start by applying the tape in fun geometric patterns—think triangles, diamonds, or stripes—to add a contemporary flair.
Once your design is set, paint in vibrant colors like teal, mustard yellow, or coral. After the paint dries, carefully peel off the tape to reveal your stylish patterns. For a flawless finish, consider using a clear polycrylic sealant to give your pumpkin a glossy look! This approach not only transforms your pumpkin into a piece of art but also makes it a standout piece on your porch.
2. Create Adorable Animal Faces

Who says you need a carving knife to bring your pumpkins to life? Start by picking a round pumpkin as your canvas. Next, grab some non-toxic paint—think bright colors like orange, white, and black. Sketch your desired animal face directly onto the pumpkin with a light pencil.
Once you’re happy with the design, paint away! For an extra dose of cuteness, you can create felt ears. Simply cut out ear shapes from felt (like pointy cat ears or floppy bunny ones), and glue them on the top of your pumpkin. This adorable animal face will add a playful charm to your fall decor, perfect for a front porch or even as part of your living room centerpiece. Plus, it’s a delightful project for kids to get involved with! Enjoy showcasing your creative masterpiece!
3. Use Metallic Paint for Elegance

Metallic paint is a game-changer when it comes to pumpkin decorating! To achieve that elegant look, simply grab some metallic gold or silver spray paint—Krylon and Rust-Oleum both have fantastic options. Start by prepping your pumpkin with a quick wash and dry. Then, set it up outside or in a well-ventilated area. Spray on a good coat, letting it dry between layers to get that perfect shine.
Imagine putting a metallic pumpkin on your coffee table or mantel, adorned with a bunch of simple white candles. Trust me, it’ll elevate your fall decor like nothing else! You can even mix and match metallic shades for a chic ombre effect or add some sparkly embellishments like sequins for extra glamour. This technique really makes your pumpkin not just a decoration, but a standout piece. Go ahead, give it a try, and watch it become the star of your autumn display!
4. Craft Floral Pumpkins with Petals

What a fun way to bring a touch of fall inside your home! To create your floral pumpkins, start with a smooth artificial or real pumpkin, whatever you prefer. Gather some colorful paper or silk flowers—think bright sunflowers, delicate daisies, or even elegant roses.
First, trim your flowers to manageable lengths, then use a strong craft glue to adhere them to the pumpkin’s surface. For an extra pop of freshness, paint some leafy accents around the flowers using acrylic paint. Soft greens and deep autumn hues work wonderfully for this seasonal look.
Place your finished floral pumpkins on a mantel or table, and watch your guests marvel at your creative touch! They’re a perfect centerpiece for gatherings or just to brighten up your living space. Happy crafting!
5. Draw Friendly Ghost Faces

Transforming your pumpkin into a friendly ghost is super simple and oh-so-charming! Start by painting your pumpkin entirely white—acrylic paint works best for a smooth finish. Once it’s dry, grab a black marker to doodle on delightful ghost faces. Think big eyes and cheerful grins for a friendly vibe!
For an extra touch, you can use glow-in-the-dark paint for those faces. Just imagine the smiles it brings while trick-or-treaters stroll by in the evening! This project requires minimal materials and delivers maximum cuteness—perfect for families or anyone looking to add a whimsical touch to their fall decor. So, gather the little ones and let your creativity flow!
6. Decorate with Pom-Poms and Yarn

Transform your pumpkins into a cozy masterpiece with colorful pom-poms and yarn! Start by selecting a pumpkin of your choice. Grab various shades of yarn—think autumn hues like orange, brown, and cream. For a fun twist, let the kids pick out their favorite colors too!
Begin by wrapping the yarn around the pumpkin’s stem to give it a warm, inviting look. Then, use hot glue to secure different-sized pom-poms all over the pumpkin’s surface. You can create playful patterns or a random mix for a whimsical feel. This project is not only easy and mess-free but also perfect for family gatherings or Halloween parties. So, grab your supplies and get ready to craft a pumpkin that’s filled with personality!
7. Subtle Dot Painting Technique

For a chic and minimalist pumpkin design, try the subtle dot painting technique! Grab some cotton swabs and your favorite acrylic paint colors—think soft pastels or classic black and white.
Start by dipping a cotton swab into the paint and gently dot it onto the pumpkin’s surface to create intricate patterns. You can go for random clusters, stripes, or even a gradient effect. Just remember, a little goes a long way! For added flair, consider using different sizes of swabs or even a toothpick for tiny dots.
When styling, place your finished pumpkins on a natural wood tray or a bed of soft burlap for a cozy vibe. This understated design brings a touch of elegance to your fall decor without any fuss—perfect for those who love simplicity with a hint of creativity!
8. Personalize with Initials or Words

One of the easiest ways to add a personal touch to your pumpkins is by painting your initials or a favorite word. Grab a small pumpkin, a paintbrush, and some acrylic paint in colors that complement your fall decor. For a quick design, you might write “Boo!” on a classic orange pumpkin or your family’s initials on a white pumpkin for a chic look.
To start, make sure your pumpkin is clean and dry. You can use a stencil for precise lettering—just place it on the pumpkin and carefully fill it in with paint. Let it dry completely before displaying your pumpkin masterpiece on your porch or even indoors as part of your seasonal decor. It’s a simple process, and it definitely adds a unique touch that will make each pumpkin feel special!
9. Ribbons and Bows Chic Style

Ribbons and bows can transform your pumpkin into a chic, decorative masterpiece! To get started, grab some beautiful satin or burlap ribbon in colors that complement your home decor. Begin by wrapping the ribbon around your pumpkin, crisscrossing it for a layered look. Finish off the arrangement with a lovely bow on top for that extra touch of whimsy.
For a fun twist, consider mixing patterns! Pair solid ribbons with striped or floral designs to keep things interesting. When styling a mantelpiece, place several ribbon-adorned pumpkins of varying sizes together to create a striking display. Remember, it’s all about playing with textures and colors to reflect your unique style!
10. Colorful Decoupage with Tissue Paper

Colorful decoupage with tissue paper is such a fun way to decorate pumpkins, and it’s super easy! Start by gathering some colorful tissue paper in various shades. Cut the tissue into shapes or strips—think whimsical patterns or playful designs. Then, grab your trusty Mod Podge and a foam brush.
Begin by applying a thin layer of Mod Podge to a section of your pumpkin, then gently lay your tissue paper pieces on top. Smooth them out to avoid wrinkles, and seal with another layer of Mod Podge over the top. You can mix and match colors for that vibrant, patchwork look—use contrasting shades for added visual interest!
When styling your finished pumpkin, consider grouping it with some natural elements like acorns or cinnamon sticks for a cozy autumn display. This allows your beautiful creation to shine while harmonizing with the season!
11. Simple Chalkboard Paint Design

Coating a pumpkin in chalkboard paint is such a fun and flexible way to decorate for fall! Simply grab a pumpkin and give it a good layer of chalkboard paint. Once it’s dry, the real fun begins—grab some colorful chalk and start doodling your favorite designs or spooky faces.
The beauty of this idea is that you can change it up as often as you like! One day it could be a friendly jack-o’-lantern, and the next day it could showcase a pretty autumn pattern. Pro tip: Seal the chalk with a clear spray to help your designs last longer! This way, you can enjoy your pumpkin throughout the entire season.
12. Create Confetti Art Pumpkins

Creating confetti art pumpkins is a delightful way to add a burst of color to your fall decor without the mess of carving! Start by gathering a selection of colorful confetti dots—think vibrant blues, oranges, and golds.
To begin, simply take a craft glue or spray adhesive and apply it evenly across a section of your pumpkin. Then, carefully press the confetti dots onto the glued area, repeating until the entire surface is covered in joyful dots. For added fun, consider mixing different sizes of confetti or even creating patterns as you go.
This festive design not only looks cheerful but also makes for a great centerpiece at your next Halloween party or autumn gathering! Just be sure to place your pumpkins in a spot where they can shine without facing too much moisture. Enjoy the playful process!
13. Wrap in Lace for Elegance

Wrapping delicate lace around your pumpkin is a charming way to achieve an elegant, vintage-inspired look that’ll impress your guests! First, choose a lace material that you adore—think soft, neutral tones like ivory or soft gray. Simply lay the lace flat, place your pumpkin in the center, and start wrapping it around, ensuring it’s snug but not too tight.
For a little more flair, consider layering different lace patterns or slipping in a strand of twinkle lights before finishing the wrap. This adds a magical touch, especially when placed on your porch or dining table. Trust me, this budget-friendly idea not only enhances your fall decor but also brings a touch of timeless beauty to your home! Happy decorating!
14. Polka-Dotted Pumpkins with Style

Polka-dotted pumpkins are a super fun way to add a pop of personality to your fall decor! Start with a few medium to large pumpkins and choose a neutral base color like white or light gray. Next, grab some acrylic paints in vibrant hues—think bright oranges, blues, or pinks. Use a round sponge or the end of a paintbrush to create bold polka dots all over your pumpkin.
Pro tip: For a uniform look, use a template or stencil, or just freehand it for a more playful vibe. Once dry, arrange these colorful beauties on your front porch or as a cheerful centerpiece indoors, and just watch how they brighten up the space!
15. Make Striped Patterns with Washi Tape

Transforming your pumpkin with washi tape is like giving it a playful outfit! Start by selecting a few rolls of washi tape in various colors and widths—think bold stripes and soft pastels for contrast.
1. First, clean your pumpkin to ensure the washi tape sticks well.
2. Next, decide whether you want vertical or horizontal stripes; both can be stunning!
3. Begin applying the tape, overlapping it slightly for a more dynamic look. Don’t worry about being perfect; the charm is in the imperfections.
For an added touch, mix and match some patterns—like polka dots or florals—to keep things fun! Once you’re done, place your stunning creation on your doorstep or mantle to show off your artistic flair. It’s a quick and cheerful way to add a splash of color to your fall decor!
16. Create Holographic Designs

Ready to add a touch of magic to your fall décor? Try creating holographic designs on your pumpkins! Simply grab some holographic foil and a DIY adhesive (like Mod Podge). Start by applying the adhesive to sections of your pumpkin with a paintbrush.
Next, cut your holographic foil into fun shapes—think stars, swirls, or even geometric patterns. Press the foil onto the sticky areas, and voilà! The foil will change colors as the light hits it, creating a mesmerizing effect that’s sure to impress. For a modern twist, consider pairing it with a sleek, matte-finished pumpkin to create contrast.
This idea is perfect for a cozy fall gathering—it’s a conversation starter that’s also super easy to execute. So gather your supplies and let your creativity shine!
17. Craft a Butterfly Pumpkin

Transforming your pumpkin into a beautiful butterfly creation is both fun and easy! Start by selecting vibrant colored papers—think pastels or autumn hues. Cut out butterfly shapes in various sizes, and don’t shy away from incorporating different patterns like polka dots or floral prints for extra flair.
Once your butterflies are ready, use adhesive spray or a glue stick to attach them to your pumpkin’s surface. Arrange them as if they’re fluttering up the pumpkin! To enhance the effect, consider adding a few fabric or feather accents for texture. When showcasing your masterpiece, place it against a natural backdrop like leafy greens or hay bales to really make it pop! This charming decoration not only embraces fall but also encourages creativity for future decorating escapades.
18. Use Nature-Inspired Leaf Prints

For a delightful twist on traditional pumpkin decorating, why not try nature-inspired leaf prints? Simply take some real or faux leaves, dip them in your favorite paint, and press them onto your pumpkin. The result is a stunning, botanical design that beautifully captures the essence of autumn.
You can get creative with the types of leaves you use—maple leaves for a vibrant splash of red and orange, or ferns for a subtle, elegant touch. Make sure to apply even pressure when pressing the leaves down to get those intricate vein details. This technique not only looks fantastic but is also super easy and fun for kids!
Grab some pumpkins and a few leaves from your backyard, or pick up some faux ones from a craft store, and let your artistic side shine!
19. Design Vintage-Inspired Sepia Tones

For a charming vintage-inspired pumpkin, grab some sepia and beige paints for a warm, nostalgic look. Start by prepping your pumpkin with a coat of beige as the base. Once it’s dry, lightly brush on sepia in strategic areas to create depth and a little aged effect—think about where the light naturally hits your pumpkin.
To elevate your design, consider adding subtle stenciled patterns or even handwritten quotes that evoke a sense of nostalgia. You could also tie in rustic elements like twine or dried flowers around the stem to complete the vibe. When styling your pumpkins, balance them on a wooden crate or alongside soft, textured throws in neutral hues for a perfect fall arrangement that feels both cozy and timeless!
20. Bright Ombre Fade Painting

Bright Ombre Fade Painting is such a fun way to give your pumpkins a stunning visual effect without any mess. Start by choosing two or three complementary colors—think bold corals blending into soft pinks or a rich emerald fading into a sunny yellow.
Begin by painting the bottom of the pumpkin with your lightest shade. While it’s still wet, use a clean brush to blend in your second color. Be sure to float the brush lightly over both colors to create that beautiful gradient.
Once you’re happy with the fade, add a glossy topcoat for a sleek finish! When styling your ombre pumpkins, group them in shades that reflect the colors of your fall decor, like your cozy throws or table settings. It’s a great conversation starter too—friends will love the stunning pop of color in your space!
Wow, there you have it—twenty amazing, no-carve pumpkin decorating ideas that are sure to spark some creative joy! You’ve got everything from whimsical designs to elegant touches, all without the mess of carving. I hope something among these ideas truly resonates with you and inspires your own creative magic.
Remember, the most important thing is to have fun with it and let your personality shine through. Whether you’re a paintbrush pro or someone just playing with stickers and ribbons, you’ve totally got this. I’m genuinely excited to see how your pumpkins turn out—I’m sure they’ll be fabulous! So go ahead, dive into this festive project, and enjoy every moment of your decorating journey.
Happy decorating, and may your pumpkins bring a smile to your face every time you see them!