Last weekend, I found myself standing in my cluttered kitchen, wondering how I had accumulated so many mismatched containers and stray lids. You know the feeling when you open a cupboard and things almost tumble out? It’s like a mini obstacle course every time you need a simple mixing spoon. I realized I needed a solution, fast, and that’s when I stumbled upon the treasure trove that is the dollar store. It’s incredible what a few inexpensive items can do to transform chaos into calm.
We’ve all been there, wrestling with our own little messes, trying to figure out how to maximize our space without breaking the bank. The good news? There’s a way to spruce things up and make everything neatly accessible in an affordable manner. I’ve put together 18 of the best organization hacks I discovered, each one a tiny triumph in making our living spaces just a little more lovely. Join me as we dive into these practical ideas that will not only organize your home but may also spark some unexpected joy.
1. Transform Baskets into Chic Shelving
Transforming simple dollar store baskets into chic shelving is both clever and budget-friendly! Start by picking stylish baskets that fit your aesthetic—think woven or metal for a trendy vibe.
Once you’ve chosen your baskets, attach them to the wall using sturdy wall hooks or brackets. Arrange them in a way that pleases your eye; in a staggered pattern can create an interesting visual. To add character, fill them with lightweight decor like plants, books, or craft supplies.
For instance, in a small home office, use these baskets to hold your favorite notebooks or colorful folders. Voilà! You now have stylish yet functional shelving that not only saves space but also showcases your personality. Plus, this hack can easily be changed out seasonally!
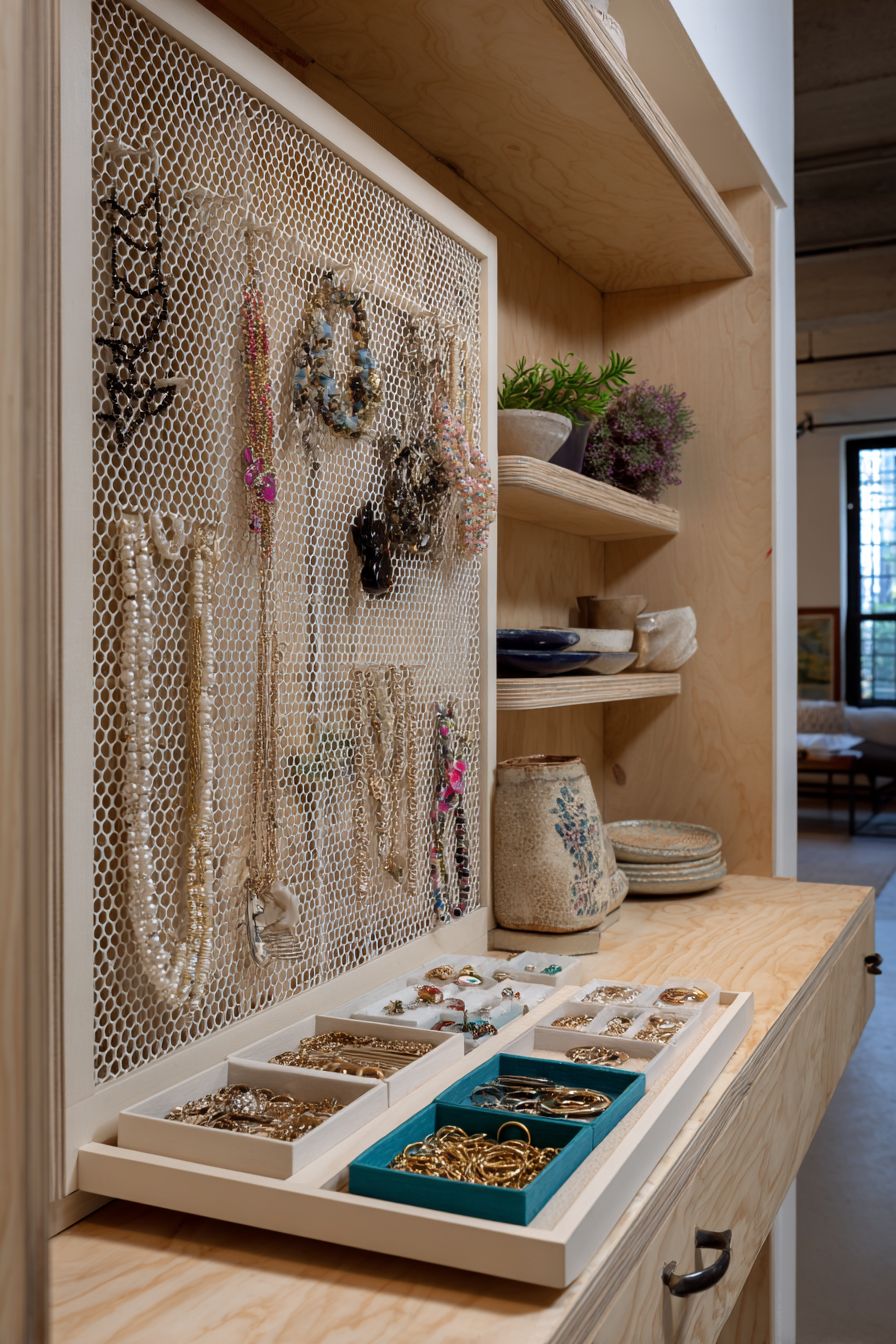
2. Create a DIY Jewelry Organizer

Using a muffin tin as a DIY jewelry organizer is a fun and practical way to keep your accessories sorted and easy to grab! Start by gathering a standard muffin tin from your local dollar store. Once you have it, simply assign each section for different types of jewelry—like one for rings, another for earrings, and maybe even a spot for bracelets.
To further personalize your organizer, consider spray painting the tin in a fun color or covering it with decorative paper. This way, it adds a pop of style to your dresser! When styling a small bedroom or changing cluttered drawers into cohesive displays, this little hack keeps everything neat and beautiful. Plus, you can quickly see all your options at a glance!
3. Maximize Space with Over-the-Door Racks

Over-the-door racks are a game-changer for any space, especially if you’re working with limited room. Simply hang a shoe rack on your door and you’ll instantly create extra storage. I love using these racks for more than just shoes—think cleaning supplies, craft materials, or even snacks in the pantry!
To get started, measure your door and pop into your local dollar store for a durable rack. Install it in seconds with no tools needed. Trust me, you’ll be amazed at how much clutter you can tackle with this simple addition!
4. Organize Cords with Plastic Hair Rollers

If you’re tired of battling a tangled mess of cords behind your TV or desk, grab some plastic hair rollers from the dollar store! Simply wrap your cords around the rollers, securing them with a rubber band for an extra hold. This nifty trick not only keeps cords neat but also makes them super easy to find when you need them. When styling a cozy media area, these color-coded rollers can even add a playful touch! Plus, they’re affordable and reusable—perfect for a clutter-free space!
5. Craft a Handy Kitchen Organizer

A shower caddy isn’t just for the bathroom—it’s a game-changer in the kitchen too! Start by choosing a sturdy, multi-pocket caddy. Place it on your countertop or hang it under the cabinet. Gather your spices or utensils, grouping them by type, like all your baking essentials or everyday cooking spices.
For example, if you love to cook with herbs, try labeling small jars with their names and stacking them in the caddy. This way, everything is within arm’s reach and beautifully organized. Plus, you can easily grab it when you need to move around while cooking! Such a simple hack brings a clutter-free vibe to your kitchen space effortlessly.
6. Simple Storage with Mason Jars

Mason jars are a charming and functional way to get your small items like nails, beads, or even craft supplies organized! To start, simply gather your mason jars and decide which items you want to store. For instance, if you have a collection of buttons, sort them by color or size for an eye-catching display.
Once you’ve filled your jars, label them using washi tape or chalk paint for a personalized touch. Not only does this keep everything visible and accessible, but it also adds a rustic vibe to your decor! Try grouping them together on a floating shelf or inside a cabinet to create a cute organization station that doubles as decor. Trust me, you’ll love how tidy your space will feel!
7. Create a Hanging Storage with Tension Rods

Installing tension rods inside your cabinets is a game-changer for maximizing under-sink space! Simply choose a tension rod that fits the width of your cabinet, then secure it at a height that allows your spray bottles and other cleaning tools to hang neatly without cluttering up the shelves.
For a fun twist, consider color-coding your spray bottles with washi tape or labels from the dollar store. This makes it not just functional but visually appealing too—who doesn’t love a little organizational style? Plus, you can easily swap out bottles and keep everything within arm’s reach whenever you’re cleaning up. Give it a try and watch your under-sink chaos transform into organized bliss!
8. Budget-friendly Bookends Using Planters

Ever thought about using small planters as bookends? It’s such a fun and budget-friendly way to organize your shelves! Simply pick up a couple of sturdy planters from the dollar store, and then fill them with pebbles or decorative stones to give them some weight.
For a cohesive look, you can choose planters in colors that match your decor. When styling a small living room, pair these bookends with some colorful books and a few decorative items like candles or small plants for a well-rounded aesthetic. Not only do they keep your books upright, but they also add a charming touch to your space!
9. Clever Toy Storage Using Laundry Bins

Laundry bins aren’t just for clothes; they can work wonders for toy storage too! Grab a couple of colorful laundry bins—think fun colors that match your kids’ playroom vibe, like vibrant pink or sunny yellow.
To make cleanup a breeze, encourage your little ones to toss toys into the bins after playtime. Label each bin with stickers or tape—“Legos,” “Stuffed Animals,” etc.—to help them learn organization while making it feel like a game. This system keeps your space tidy and makes it easy for kids to find their favorite toys! Plus, the lightweight bins can be moved around effortlessly, helping you adapt the space as they grow.
10. Organize Shoes with Large Photo Boxes

When it comes to keeping your shoe collection neat and tidy, large photo boxes from the dollar store are a game changer! Start by picking up a few sturdy boxes, and consider labeling each one based on the type of shoes—think sneakers, heels, or seasonal footwear.
To keep everything looking sharp, grab some stick-on labels or a fun label maker to create a cohesive and organized look. Not only do these boxes help you avoid the dreaded shoe pile, but they also protect your precious pairs from dust and scuffs. So, next time you’re dealing with a messy shoe situation, just remember: a few photo boxes can transform your space into a stylish and orderly oasis!
11. Under-bed Storage with Fabric Bins

Transforming under-bed chaos into organized bliss is easier than you think! Grab some fabric bins from your local dollar store—these are perfect for tucking away off-season clothes.
Here’s how to do it: First, measure the space under your bed to find the right size bins. Look for breathable fabric that allows air circulation, preventing musty odors. Next, sort your clothing; pack away sweaters in spring and summer attire as the seasons change.
A pro tip: Label each bin with what’s inside—these cute labels can also be found at the dollar store. When you’re ready to switch out clothing, simply slide the bins out, and voila! You’ve decluttered your closet and made the most of that often-overlooked space. Happy organizing!
12. Upgrade Desk with Drawer Organizers

Updating your desk with drawer organizers is a game-changer! Head to your local dollar store and grab a few plastic bins or trays. When styling a cluttered desk, sort your office supplies into categories—pens in one bin, paper clips in another, and sticky notes in a third. This will not only declutter your workspace but also boost your productivity since everything will be right at your fingertips. Plus, you can personalize each organizer with washi tape labels for a fun touch! Trust me, a neat desk makes all the difference.
13. Simplify Makeup Storage with Ice Cube Trays

Using ice cube trays for your makeup storage is a game-changer! These trays provide a compact and organized way to keep your smaller items, like lipsticks and eye pencils, easily accessible. Simply line the trays up on your vanity or in a drawer, and fill each compartment with different products.
Need a little inspiration? Try categorizing by shades or types—like a tray for your daily wear and another for special occasions. Plus, it’s a budget-friendly solution you can snag at any dollar store! Give it a go, and you’ll never lose track of your favorite lippies again!
14. Organize Kids’ Art Supplies with Pencil Holders

One of the easiest and most effective hacks is to gather all your kids’ art supplies using simple dollar store pencil holders. Start by picking up a few sturdy pencil holders—you can usually find them in cute colors or designs!
Next, sort the supplies: group together markers, crayons, and colored pencils. Now, place each category into its own holder. This way, when your little ones dive into their creative projects, everything’s right at their fingertips. Plus, the visual organization means less mess!
Tip: Label each holder for even easier access, or let your kids decorate them for a personal touch. It’s a fun and practical way to keep creativity flowing without the chaos!
15. Label Everything for Easy Identification

Labeling is a game-changer for home organization! Invest in a pack of label stickers from the dollar store and grab a marker. For instance, when organizing your pantry, label jars with contents like “Pasta,” “Sugar,” or “Snacks.” This not only keeps everything tidy but also helps everyone in the family quickly find what they need.
Here’s a pro tip: go for a matching bin or jar for a cohesive look. Need an even clearer visual? Consider using color-coded labels for categories like snacks, baking supplies, and grains. Trust me, after a labeling spree, your space will feel so much more controlled and visually appealing!
16. Bathroom Tidy Up with Shower Baskets

Transform your bathroom into an organized oasis with some simple shower baskets! Grab a couple from the dollar store and hang them on the wall or inside your shower—so it’s super easy to access all your commonly used toiletries. Not only will this keep your counters clear, but it also adds a cute, rustic vibe to your space.
For a fun touch, consider painting the baskets in a vibrant color to match your bathroom décor. Hang one for shampoos and conditioners, and another for your skincare routine. This neat trick makes grooming straightforward, and you’ll never have to rummage through a cluttered cabinet again. Happy organizing!
17. Freshen Up Closet with Budget Cedar Blocks

Cedar blocks are a game changer for your closet! Not only do they combat pesky moths, but they also keep your clothes smelling divine. Just place a few blocks on your closet shelves and in drawers for an instant freshness boost.
For maximum effectiveness, consider lightly sanding the blocks every few months to release more of that wonderful cedar aroma. Plus, they look great tucked up in corners or stacked stylishly: think of them as both an organizational tool and a decor piece! Enjoy opening your closet to that fresh cedar scent while keeping those clothes safe—no harsh chemicals needed!
18. Maximize Pantry Space with Stackable Bins

Stackable bins are a game changer when it comes to pantry organization! By utilizing vertical space, you can fit more items without taking up valuable floor space. For instance, you might start by choosing clear plastic bins from your local dollar store—this way, you can easily spot your snacks or pasta at a glance.
To get started, clear out your pantry and group similar items together. That means stacking your canned goods, snacks, and baking supplies in designated bins. Not only does this maximize space, but it also simplifies finding what you need. Pro tip: label each bin with a fun design to personalize your pantry and keep it organized long-term. You’ll love how neat and tidy everything looks!
Wow, we’ve covered a treasure trove of 18 dollar store organization hacks, haven’t we? I’m so glad we got to share all these ideas together. I hope you found a few that sparked some inspiration and excitement for your space. Remember, even the smallest tweak can make a big difference in making things feel more organized and serene. You’ve got this!
Now, it’s time to roll up those sleeves and dive in, picking the ideas that resonate with you the most. Don’t be afraid to personalize them and make them your own—I have no doubt you’ll bring a touch of your unique style to your spaces. Enjoy the creative journey, and know I’m cheering you on every step of the way. Can’t wait to hear all about your transformations as you bring your vision to life!