You know that magical moment when your toddler discovers something new and their whole face lights up with pure joy? I remember watching my little one splash around in a neighbor’s water table last summer, lost in an imaginative world where measuring cups became boats and toy animals embarked on thrilling ocean adventures. It was right then I realized we needed to recreate that magic at home, but with a personal twist.
Finding the perfect water table can feel like an overwhelming scavenger hunt, especially when you’re aiming for fun, creativity, and budget-friendly options. Trust me, I get it. That’s why I dove into the DIY world, where possibilities are endless and you can tailor each project to suit your child’s interests. Today, I’m thrilled to share 15 practical DIY water table ideas that are sure to keep your toddler entertained and engaged, right in your own backyard. Whether you’re a crafting pro or a DIY newbie, these ideas are simple enough to tackle with confidence, all while sparking endless hours of playtime laughter.
1. Transform Plastic Bin into Water Wonderland
Creating a water wonderland from a simple plastic bin is a breeze! Just grab a large, sturdy bin and fill it with water, making sure to leave some space at the top to avoid spills. Then, toss in some colorful cups, small plastic toys, or even rubber ducks for an extra splash of excitement.
For a bit of added fun, you can include a few measuring cups or scoops for pouring and transferring water—perfect for little hands. To make cleanup a cinch, take it outside; once playtime is over, simply pour out the water and let the bin dry in the sun. Watch your toddler giggle and splash, transforming your backyard into their very own mini-water park!
2. Create a Water Table from Old Tires

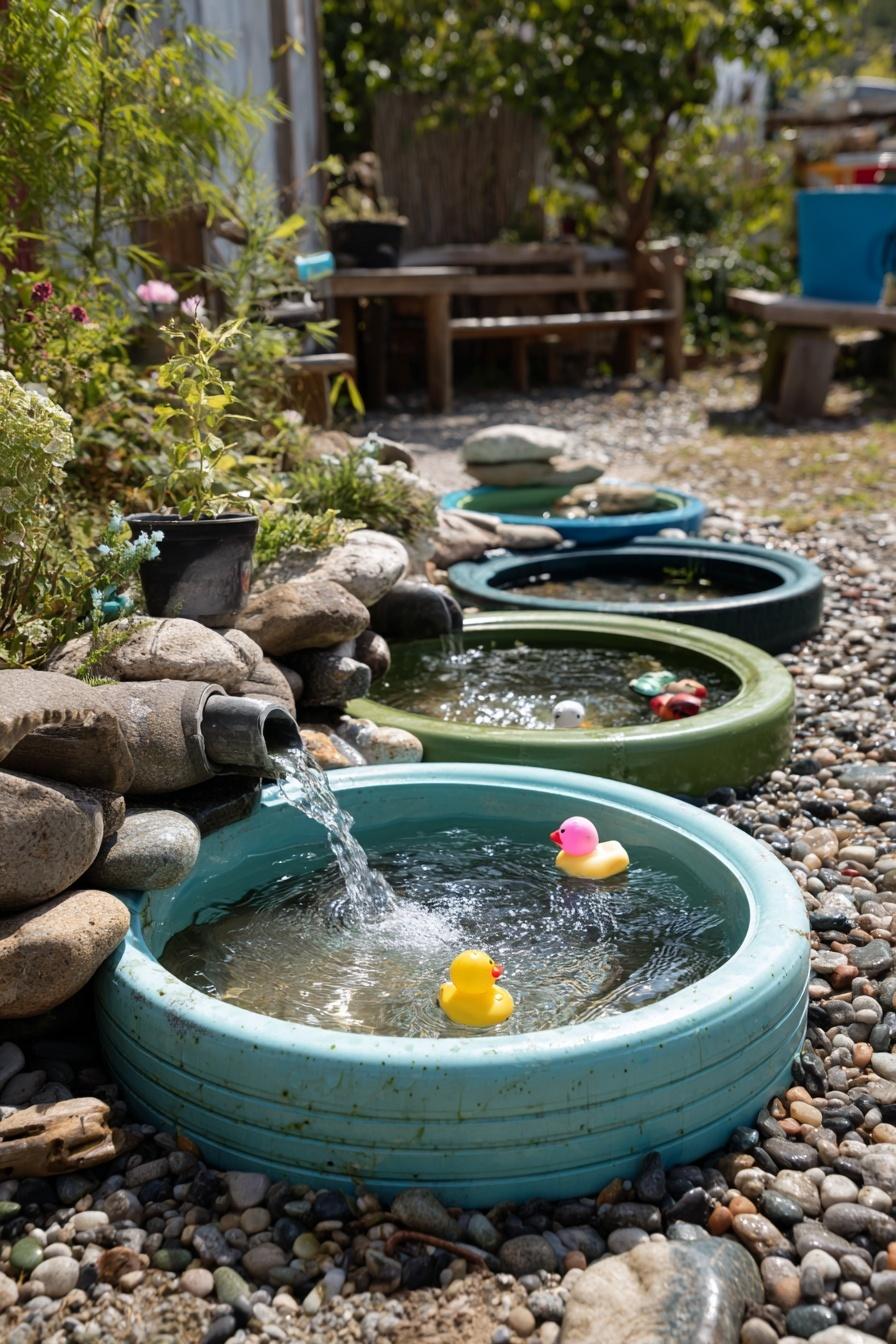
Transforming old tires into a vibrant water table is not only eco-friendly but incredibly fun for your little one! Start by stacking two or three tires on top of each other, ensuring they’re stable. For the centerpiece, add a shallow waterproof basin—this is where the water will go.
Now comes the fun part: grab some non-toxic outdoor paint and let your creativity flow! Bright colors like sunny yellow, ocean blue, and cheerful green will surely captivate your toddler’s imagination. Once it’s dry, fill the basin with water and toss in some small toys or scoops. Your toddler will love splashing around while developing their sensory skills and having a blast with the colorful setup!
3. Organize a Piping PVC Adventure Table

Creating a fun DIY water table with PVC pipes is an exciting project that can provide hours of joy for your little one! Start by cutting the PVC pipes into various lengths and using elbow and tee connectors to create a maze. You might want to include features like spinning wheels or small fountains to make it even more captivating.
Once your structure is assembled, place it over a large basin or kiddie pool to catch the splashes. Fill it with water and hand your toddler some cups and water wheels for added fun. Watching the water flow through the twisting pipes will not only keep them entertained but also encourage sensory exploration and problem-solving. Plus, it’s a great way to get crafty together! Enjoy the giggles as they experiment with the water paths you’ve created!
4. Maximize Fun with Elevated Pallet Table

Elevated water tables are a total game-changer for outdoor play! To create one, simply repurpose a wooden pallet and elevate it with some sturdy legs. You can find pallets for free at local shops or nurseries, making this a budget-friendly project.
Once you have your elevated pallet table in place, grab some plastic storage bins or tubs and fill them with water. Add a mix of fun bath toys, cups, and scoops to keep your toddler engaged. For an extra sensory experience, toss in some colorful marbles or rubber ducks.
Just imagine your little one splashing around, discovering textures, and exploring water play at a comfortable height! Don’t forget to supervise closely, and consider setting it up on a splash mat to contain any mess. Happy DIY-ing!
5. Simple Cement Mixing Tray Setup

A cement mixing tray can be a fantastic solution for a water play station! Start by choosing a tray that’s at least 3 feet long. Next, fill it with about 2-3 inches of water. Now for the fun part! Offer your toddler a variety of floating objects like plastic boats, sponge animals, or even measuring cups for some hands-on experimentation.
To make it extra engaging, discuss with them why some objects float while others sink—this sparks their curiosity and encourages learning through play. Just be sure to supervise closely to keep the splashes contained! Add some colorful outdoor toys to make the setup visually appealing too. Plus, when playtime’s over, it’s easy to drain and clean. Happy splashing!
6. Craft a Colorful Water Bottle Table

Creating a colorful water bottle table is such a fun and easy project that your toddlers will adore! Start by gathering some clear plastic bottles—think soda bottles or small juice containers. Fill them with water and add a few drops of various food dyes to create vibrant colors.
Now, here’s the fun part: seal the caps tightly to ensure no spills (you can even use some duct tape around the edges for extra security). Once everything is secure, lay the bottles out on a sturdy table or a large tray. Your little ones can roll and shake these colorful treasures, observing how the colors mix and swirl in the clear bottles. It’s a fantastic sensory play activity that encourages curiosity and discovery! Plus, it’s super easy to clean up. So, why not give it a try? Your toddler will be captivated for hours!
7. DIY Sensory Sand and Water Table

Creating a DIY Sensory Sand and Water Table is a fantastic way to spark your toddler’s creativity while enhancing their fine motor skills. Start with a low, sturdy table or a plastic storage bin divided into sections. Fill one side with sand—think kinetic or play sand for easy shaping—and the other with water.
For added fun, throw in some small cups, shovels, and some beach toys. You’ll be amazed at how quickly they dive into sculpting castles and pouring water! Don’t forget to lay down a waterproof mat underneath to catch any spills. This setup not only encourages imaginative play but also fosters sensory exploration in a safe and engaging way. Enjoy those giggles!
8. Painted Bucket Water Play Station

Take some simple metal buckets and let your creativity flow by giving them a fresh coat of paint! Choose bright colors like sunny yellow or ocean blue to make your DIY water play station pop. Once they’re dry, line them up in your backyard or on a patio—filling each bucket with different water toys, like small boats, plastic animals, or colorful sponges.
Encourage your toddler to explore by scooping, pouring, and mixing toys as they play. Pro tip: Add a splash of fun by introducing items that sink and float, igniting curiosity and making for an engaging water play experience. Your little one will love creating their own mini water worlds—perfect for summer afternoons!
9. Bowl and Tub Raceway Challenge

This Bowl and Tub Raceway Challenge is a total winner for fun water play! Start by gathering a few plastic bowls and tubs, and arrange them in a zigzag pattern on a flat surface—this will add some exciting twists and turns to the race. Fill each tub with water and let the kiddos choose their favorite floating toys—think little boats or even rubber ducks.
To make it a real challenge, you can time their races and see whose toy reaches the finish line first! Pro tip: Add a little soap to the water for extra bubbles during the race. Your little ones will have a blast competing while developing their hand-eye coordination. Plus, it’s super easy to set up and clean up afterward!
10. Garden Hose Waterfall Table

Creating a Garden Hose Waterfall Table is a delightful DIY project that will keep your toddler entertained while they cool off on warm days! Start by securing a sturdy tabletop structure—think an old wooden crate or a simple wooden frame—at a comfortable height for little hands.
Next, attach a garden hose to the top edge and create small openings every few inches along the length of the hose. As water flows through, it will cascade down, mimicking a miniature waterfall! Place a kiddie pool or a large container at the bottom to catch the fun splashes.
For a touch of whimsy, you can add colorful plastic toys or floating ducks in the pool to enhance the play experience. Just remember to supervise and ensure the area remains safe and fun!
11. Recycle Plastic Containers into Splash Zone

Transforming recycled plastic containers into a splash zone is not only eco-friendly but also super fun! Start by gathering containers of different shapes and sizes—think empty yogurt cups, plastic bottles, or even small bins. Cut holes at various heights to let water flow through.
Next, hang them on a sturdy structure like a fence or a tree branch, making sure they are low enough for your toddler to reach. Secure them well, so they don’t tip over during playtime. You can even add colorful ribbons or stickers to make them visually appealing. Watch as your little one experiments with pouring water; it’s a simple yet delightful way to explore their curiosity with cause and effect!
12. Stackable Drawer Water Play Tower

Creating a stackable drawer water play tower is not only a fun DIY project but also a fantastic way to keep your toddler engaged during water play! Simply grab some clear plastic drawers and stack them vertically. Each drawer can hold a different level of water and a variety of toys, like rubber ducks, little boats, or even measuring cups.
To craft your tower, first, make sure the drawers are securely stacked on a stable surface. Then, fill the bottom drawer with water, keeping it shallow enough for safety. In the next tier, add a few inches of water along with some colorful toys, and for the top one, you can place some dry toys or even ice cubes for a fun sensory experience. Rotate the toys regularly to keep things fresh and exciting! Your little one will love splashing and discovering new textures while refining their motor skills. Plus, the clear drawers let them see the water levels and toys, making it visually stimulating, too!
13. Floating Foam Board Experiment Table

Imagine a bright sunny day where your toddler is happily splashing around in a DIY water table! One fun and engaging activity you can set up is a **Floating Foam Board Experiment Table**. Start by cutting out colorful foam boards into fun shapes—think stars, circles, or even their favorite animals. Before placing them on the water, punch some holes in various patterns.
Once you’ve set everything up, let your little one thread yarn or string through the holes. This not only keeps them entertained but also helps boost their fine motor skills! As they weave, encourage them to talk about the colors and shapes—perfect for learning while playing. Trust me, this hands-on activity will keep them engaged for hours!
14. Nature-based Leaf and Twig Oasis

Creating a Nature-based Leaf and Twig Oasis is a wonderful way to connect your toddler with the great outdoors while they play! Start by building a simple water table using a plastic bin filled with water. Then, head outside to collect a variety of leaves, twigs, and small stones.
For a fun twist, let your little one help you gather the materials—this builds excitement and an appreciation for nature! Once you’ve gathered your supplies, encourage them to experiment by dropping the twigs and leaves into the water. They’ll love watching how the items float, sink, or create ripples.
Pro tip: To make it even more engaging, set up a little “nature journal” where they can draw their favorite finds from the water table session. It’s a great blend of creativity and discovery!
15. Dynamic Bubbly Soap Water Table

What’s better than a regular water table? A Dynamic Bubbly Soap Water Table! Just add a few squirts of dish soap to the water for a frothy, bubbly experience that will have your toddler giggling with delight.
To set it up, fill the table with water and mix in the soap until it creates lots of bubbly fun. Then, toss in some colorful sponges; they’re perfect for little hands to squeeze and squish, providing an engaging tactile experience. You can even add small cups or containers for pouring and scooping, turning it into an adventurous sensory play that keeps toddlers occupied for hours!
Make sure to supervise the bubbly mayhem, and don’t forget to have some towels nearby for when the splashes get a bit too enthusiastic. Your little one will love experimenting with the soap bubbles in their very own DIY water wonderland!
And there you have it! Fifteen fun and creative DIY water table ideas to ignite your toddler’s imagination and bring loads of enriching playtime to your backyard. Whether you’re going for something simple or a little more elaborate, remember that the best part is watching your child’s face light up with joy.
I’m so excited for you to dive into this project and see where your creativity takes you. Choose an idea that sounds like fun and give it a try—you’ve totally got this! Remember, there’s no right or wrong way to create these little worlds of wonder. It’s all about making something that resonates with you and your little one.
I hope you enjoy every step of this playful journey. You’re building lasting memories, and that’s something truly special. Happy creating, my friend!