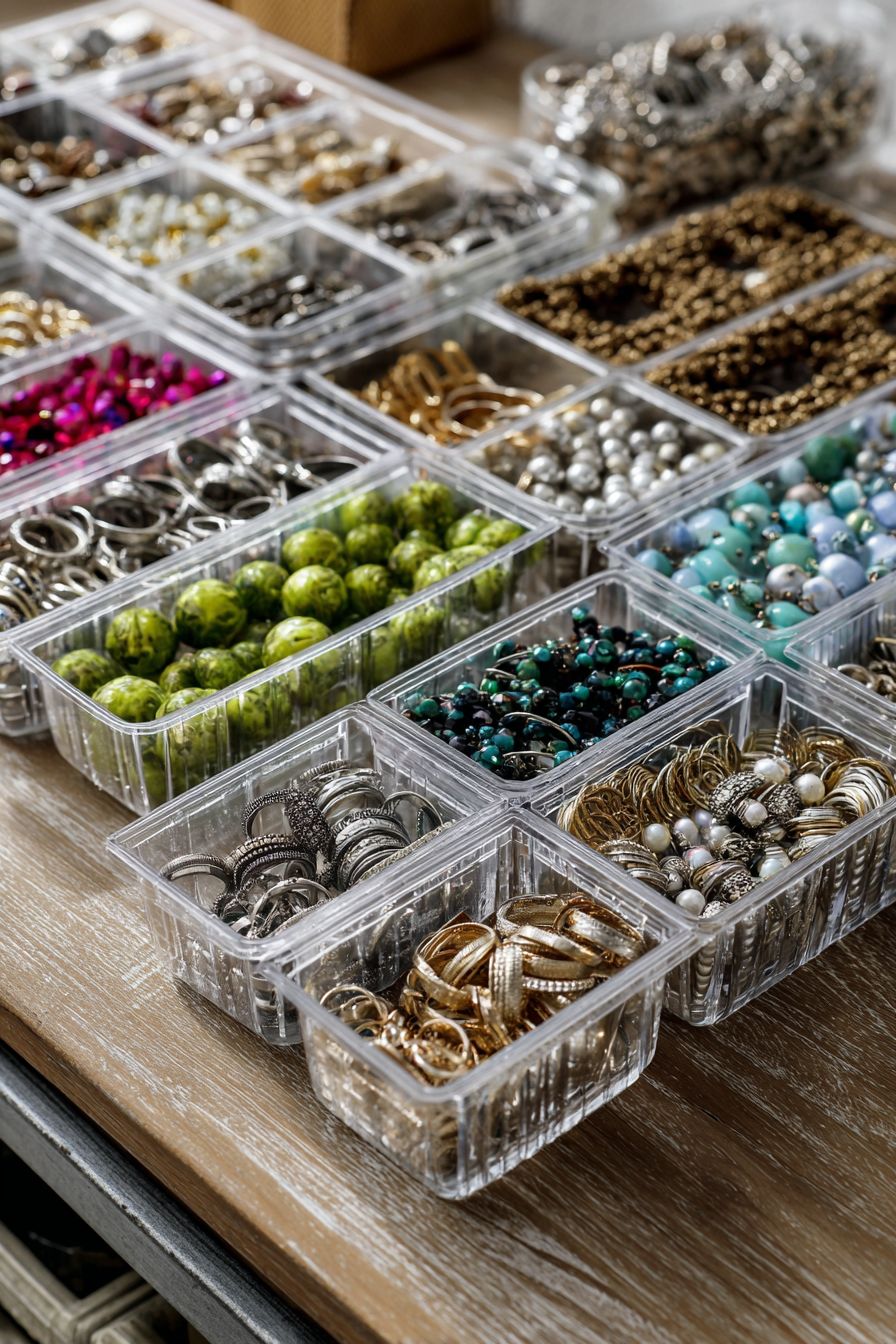
You know those moments when you open a closet or drawer, and it feels like everything is just about to spill out? It’s like a wrestling match with clutter, and trust me, I’ve been there more times than I’d like to admit. I remember a particularly frantic morning when I couldn’t find the lid to my favorite travel mug amidst the chaos—that was my tipping point. It wasn’t just about finding that lid; it was a realization that my home needed a serenity makeover without breaking the bank.
Luckily, I stumbled upon some brilliant organizing hacks at the dollar store, and it was like a light bulb switched on. I mean, who knew a few simple items and a little creativity could transform chaos into calm? If you’ve ever felt the struggle of trying to keep your space tidy on a budget, you’re going to love these 18 clever hacks that won’t just save you money but also sanity. Let’s dive in, and get ready to reclaim your home with these easy and affordable solutions.
1. Revamp Your Spice Rack with Bins
Revamping your spice rack can be a game-changer in the kitchen! Grab some small bins from your local dollar store and start by grouping your spices by function—like baking spices, savory seasonings, and herbs. It’s super easy: place all your baking essentials in one bin and your grilling spices in another.
To get started, simply remove the jars from the chaos, wipe down your shelf, and then arrange the bins in a way that’s both accessible and visually pleasing. When styling a small kitchen, consider using labeled bins to make it even easier to find your favorite flavors at a glance. Trust me, this simple organizing hack will turn your spice chaos into a tidy sanctuary, saving you time and adding a little design flair to your cooking space!
2. Create a Jewelry Organizer with Ice Trays

Have you ever rummaged through a tangled mess of jewelry, wishing you could just find that one pair of earrings? Here’s a super simple solution: transform a dollar store ice tray into a nifty jewelry organizer!
First, grab a couple of ice trays—clear or colorful, whichever matches your style. Use each slot for different pieces, like rings in one section and earrings in another. Not only does it keep everything tangle-free, but it also makes it easy to see all your options at a glance.
For a fun touch, you can even label each row with washi tape to indicate which pieces go where. This trick keeps you organized and adds a cute decor element to your vanity or dresser. Happy organizing!
3. Maximize Closet Space with Shower Hooks

Want to make the most of your closet space? Try using shower hooks! They’re incredibly versatile for organizing your accessories. Simply grab a pack from the dollar store, then attach them to a rod in your closet.
For example, hang your favorite scarves so they’re easy to see and grab, or use them for belts and even lightweight handbags. This keeps them off the ground and free from wrinkles. Plus, it’s a super budget-friendly way to keep everything neat and accessible! Happy organizing!
4. Use Tension Rods Under Sinks

Installing tension rods under your sinks is a game changer for organizing cleaning supplies! Simply measure the width of your cabinet and buy a rod that fits. Once installed, hang your spray bottles from the rod using S-hooks or curtain rings. This not only frees up valuable shelf space but also makes it super easy to grab what you need when you’re in a cleaning frenzy. Plus, you can easily see all your bottles at a glance, reducing clutter. It’s such a simple and effective way to make that space work for you!
5. Store Craft Supplies in Jar Caddies

Are you tired of rummaging through messy drawers for your craft supplies? A super simple solution is to repurpose dollar store jars into handy caddies! Start by grabbing a few glass or plastic jars. You can use larger jars for bulkier items like paintbrushes and smaller ones for beads or pencils.
To create your caddy, you could use a sturdy tray as the base. Just arrange the jars on the tray, clustering them by type of supply to reduce chaos! For a personal touch, decorate the jars with washi tape or labels, so you know what’s inside at a glance. This fun little project not only keeps your crafts organized but also adds a pop of charm to your workspace—perfect for when creativity strikes!
6. Organize Pantry with Clear Containers

Decanting your grains, pasta, and snacks into clear containers is a game-changer for pantry organization! Not only does it give your pantry a sleek, cohesive look, but it also lets you check food levels at a glance—so you never accidentally buy more rice when you’re already stocked up.
To start, grab a few clear storage containers from the dollar store; I love the stackable ones for saving space! Pour your snacks into these containers and label them using cute chalkboard labels. You’ll feel like a pro chef in your own kitchen. Plus, it makes meal prep a breeze since everything is easy to find!
7. Label with Chalkboard Stickers

Labeling your jars and bins doesn’t have to be boring—enter chalkboard stickers! Grab a pack from your local dollar store and transform ordinary containers into stylishly organized treasures. When organizing your pantry, for example, use these stickers to label jars containing flour, sugar, and spices. Simply write, wipe clean, and repeat as your needs change.
Want a fun way to categorize toys in the playroom? Stick some chalkboard labels on colorful bins. That way, they can evolve as your little ones grow! Plus, it adds a creative touch to your decor. Now you’re not just organizing—you’re also decorating!
8. Utilize Drawer Organizers for Utensils

Transform your kitchen drawers into a well-organized haven by using dollar store drawer organizers. These nifty compartments help you sort utensils, making it easier to grab what you need while cooking.
Start by measuring your drawer to ensure a perfect fit for the organizers. When you head to the dollar store, look for modular organizers that can be stacked or configured in various arrangements. For instance, a simple cutlery tray combined with a few small bins can keep your spoons, forks, and knives neatly separated.
And here’s a pro tip: if you have larger utensils like spatulas or whisks, designate a section for those items too! This smart approach not only boosts your kitchen’s efficiency but also adds a touch of tidiness that makes your cooking space feel so much more inviting.
9. Line Shelves with Decorative Paper

Enhance your shelves in a snap by lining them with colorful decorative paper! Simply cut the paper to fit each shelf, and not only will it provide a non-slip grip for your items, but it’ll also inject some personality into your space. For a playful touch, choose patterns that match your room’s theme—think cheerful florals for a kitchen or chic geometric designs for a home office.
Pro tip: Use double-sided tape to secure the edges, ensuring a clean look. This hack is perfect for transforming boring shelves into vibrant displays while offering protection for the surfaces underneath. So grab some paper on your next Dollar Store run and let your creativity shine!
10. Create Hanging Storage with Command Hooks

Transforming your space can be as simple as picking up a few Command hooks! These handy little gadgets are perfect for creating hanging storage solutions. For instance, when organizing a small entryway, consider using hooks to suspend lightweight fabric bags or woven baskets. Not only does this free up valuable floor space, but it also adds a trendy touch to your decor.
To get started, decide where you want to hang your storage—walls or inside doors work beautifully. Simply peel and stick your Command hooks according to the weight they can hold. Then, fill those baskets with everything from hats and scarves to craft supplies. You’ll be amazed at how much more functional your space becomes while keeping everything stylishly tucked away!
11. Transform Baskets into Bathroom Holders

One of the easiest ways to elevate your bathroom organization is by transforming cheap dollar store baskets into stylish holders for your towels and toilet paper. Start by choosing a few attractive baskets—wicker or fabric options work great!
Begin by designating a specific area in your bathroom, like a cozy corner or a simple shelf, to showcase these baskets. For a chic look, neatly roll your towels and stack them within one basket, while another can house extra toilet paper.
Pro tip: Consider adding a small label to each basket for even more charm and organization. Not only does this DIY update make everything look tidier, but it also ensures you have everything on hand when needed, giving your bathroom a fresh and functional feel!
12. Use Binder Clips for Cable Management

If you’re looking for a quick and budget-friendly way to manage those pesky charging cables, binder clips are your new best friend! Simply attach a few binder clips to the edge of your desk, and voila! You now have a neat docking station for your cords.
For an even snazzier setup, try color-coding the clips based on the device they belong to—like one for your phone and another for your laptop. This not only keeps things tangle-free but also adds a pop of personality to your workspace! So next time you’re fighting with a mess of cords, grab some binder clips and enjoy a more organized desk in no time.
13. Make a Medicine Cabinet with Plastic Bins

Transform your chaotic cabinet into an organized oasis with plastic bins from the dollar store! Start by selecting a few bins in varying sizes to suit your different medications and first-aid supplies. Then, categorize everything—pain relievers in one bin, cold and flu medicine in another, and band-aids or ointments in a third.
Label each bin clearly; you can even get creative with washi tape or print labels for a polished look! This not only clears the clutter but also allows you to find what you need in a snap, especially during those midnight emergencies. Happy organizing!
14. Hang Pots with Metal S-Hooks

If you’re tired of rummaging through cluttered cupboards to find your pots and pans, it’s time to embrace a simple, stylish solution: metal S-hooks! Just grab a couple of these handy hooks from your local dollar store, along with a sturdy curtain rod or a piece of wooden dowel.
To set it up, secure the rod to the wall in your kitchen, and then hang those S-hooks to create a chic pot rack. This nifty little trick saves cupboard space while also turning your cookware into a decorative element. For a cozy, rustic vibe, consider painting the rod a fun color or staining it to match your kitchen decor. Plus, keeping your pots and pans visible not only makes cooking a breeze but also adds a charming touch to your space!
15. Use Pegboards for Garage Tools

Organizing your garage can feel daunting, but using pegboards is a game changer! Start by picking up a couple of pegboards from your local dollar store—these are super affordable and lightweight. Once you have them, affix them to an empty wall in your garage using simple screws or wall anchors.
Next, dive into those assorted hooks and clips, which you can easily find at the dollar store as well. Hang your tools like hammers, wrenches, and screwdrivers to keep everything tidy and within reach. This not only maximizes your wall space but also turns your garage into a functional workspace you’ll love using. Plus, you can customize the layout to fit your style—maybe arrange tools by type or frequency of use. So grab those pegboards and get to organizing; your garage will thank you!
16. Organize Drawers with Cardboard Dividers

Are your drawers a chaotic jumble of mismatched items? Grab some cardboard and get ready to reclaim that space! Simply cut the cardboard into strips to create custom dividers that fit your drawers perfectly. This DIY method is fantastic for keeping small items like office supplies, craft materials, or even kitchen utensils neat and easily accessible.
For a fun project, try using patterned cardboard to add a touch of personality to your drawers. You could even go a step further and label each section for extra organization. It’s like having a mini treasure map guiding you to what you need—how easy is that? Happy organizing!
17. Create a Ribbon Dispenser with Tension Rod

Creating a ribbon dispenser using a tension rod is a game changer for any crafting space! Simply thread your ribbon spools onto the rod and secure it in a closet or along your craft table. This clever setup keeps your ribbons organized and tangle-free, allowing for easy access during projects. When styling your craft area, consider using a decorative tension rod to enhance the space visually. Plus, you can easily switch up the arrangement as your ribbon collection grows—just slide the spools on and off! Happy crafting!
18. Organize Shoes with Stackable Bins

Stackable bins are a total game changer for organizing shoes! Head to your local dollar store and grab a few clear bins. Once you have them, start by grouping your shoes—think sneakers on the bottom, heels in the middle, and sandals on top. Not only do these bins save floor space, but they also allow you to see exactly what you have at a glance, making those frantic morning searches for the right pair a breeze.
Pro tip: Label each bin with a simple sticker showing what’s inside or even use fun designs that match your style. This way, keeping everything tidy feels more like a fun project than a chore!
Oh, wasn’t that fun? We’ve just explored 18 clever ways to bring a wave of order into our lives, all thanks to those hidden gems from the dollar store. It’s amazing how a little creativity paired with a budget-friendly find can transform a messy corner into a harmonious space. So, pick the hacks that sparked a little joy within you and give them a try!
Remember, organization isn’t about perfection—it’s about crafting a space that feels good to you. You’ve got this, and I’m cheering you on every step of the way! Dive in and enjoy the process of making your home uniquely yours. I can’t wait to hear all about your amazing transformations. Happy organizing, my friend!